How to make a pie crust

I love making pies. I’ve talked about this before, but seriously, it’s almost therapeutic for me. There’s just something so satisfying to me about making the whole thing from scratch – crust, filling, everything. And it just tastes soooo much better than those horrible frozen pies, or the ones in the grocery store bakery that have probably been sitting there for a week and don’t seem to actually contain real fruit.

And maybe it’s just because I like to make them, or maybe I’m just a snob, but there really is a huge difference between a pie with a homemade crust and a store-bought crust. I know, it’s just the thing that holds the filling together. No one eats pie for the crust. But still, if you start with a good crust, the whole pie is better. Trust me.

My mom is a wonderful cook, but she just refuses to make her own pie crusts. She’s convinced it’s too much work, too hard, and never turns out right. But I promise, they’re really not that hard! So I’m going to share a few tips, tricks, and my go-to recipe so that you can make your own pie crusts and dazzle everyone with your amazing pie-making skills.

how to make a pie crust 1 First, let me introduce you to my friend the pastry blender. This simple little kitchen gadget makes all the difference in making perfect pie crusts. They’re pretty cheap, and you can find them anywhere they sell kitchen tools. But this thing does most of the work for you.

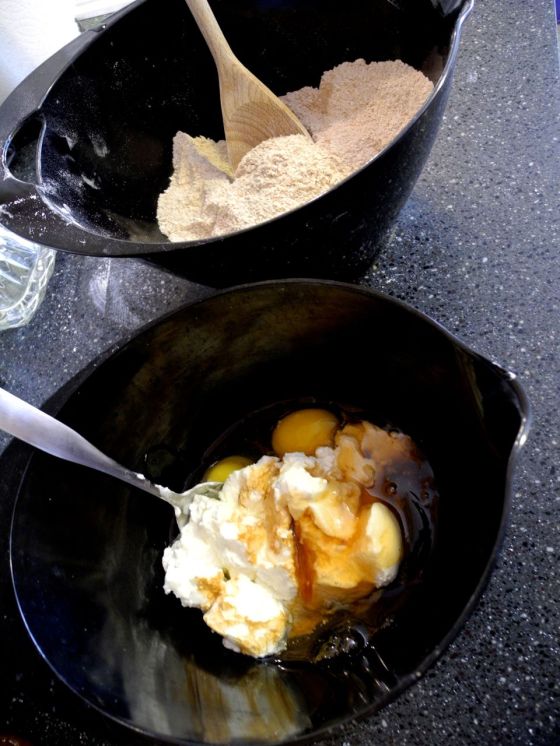
Put your flour and salt in a large bowl, and mix together. Then add the shortening, and use the pastry blender to mix. Use a scooping motion to cut the shortening into the flour. You’ll probably need to occasionally scrape some of the shortening off the sides of the pastry blender.

how to make a pie crust 2

See in the picture above, there are still large chunks of shortening, but it’s starting to get this crumbly texture. Keep using the pastry blender, in that same sort of scooping motion, to break up the shortening and blend it in to the flour.

how to make a pie crust 3

This is about the texture you want it to be – nice and crumbly looking, almost like lots of little pea-sized lumps. Now you’re ready to add the water. Use cold water! This keeps the shortening from melting. I know some people even use ice water, but as long as it’s cold, it’s worked for me.

Start adding the water one tablespoon at a time. You can keep using the pastry blender at first, but I usually end up using my hands once it starts getting soft and sticky.

how to make a pie crust 4

Your dough should look about like this – a little bit sticky, but still kind of flaky. If it won’t stick together, add a little more water. If it’s really sticky and wet, add a little more flour. Don’t over-mix or knead it, just mix till it will stick together and form a ball. You want a nice marbled look (you can see it better in the picture below). Form a ball, and turn it out onto a floured surface to roll it out. Press the ball flat with the palm of your hand. You can refrigerate the dough for about half an hour now, wrapped in plastic wrap, before rolling it out – some say it’s easier to roll and makes the crust more flaky. I usually don’t (because I don’t plan ahead and have enough time…) and mine still turn out fine.

how to make a pie crust 5

Roll it out until it’s nice and thin. If it starts to tear, wet your fingers and patch it back together. If the dough sticks to the rolling pin too much, rub a little more flour onto the rolling pin. When rolling the dough, use firm and even pressure on the rolling pin to push the dough out and away rather than down. Change directions often to create a circle. (Don’t worry if it’s not perfectly round. Mine never are. You’ll trim the edges later anyway. You just want to make sure it’s roundish so it will fit in your pie pan.)

You can see that nice marbled look in the picture above – it’s the shortening not completely blended in with the flour. This is what makes the pie crust flaky! That’s why you don’t want to over-mix it.

Once you think it’s thin and big enough, turn your pie plate upside down over the crust to measure; it should come out at least one to two inches all the way around the edge of the pie pan. If it’s big enough, you’re ready to move it to the pie pan!

how to make a pie crust 6

The best way I’ve found to do this is slowly and gently lift one side and fold the crust in half. Then, still slowly and gently, lift one side to fold it in fourths. Now pick up the wedge of crust, move it to the pie pan, and unfold it. If there are any tears, wet your fingers and press the crust back together.

Now trim any extra around the edges (you can leave a little extra either to make a decorative edge, or to seal the top crust on) and fill your pie! Or if you’re making a cream pie or other pie that doesn’t need to bake, poke a few holes with a fork in the bottom and side, and bake the crust. (The holes keep it from puffing up or forming bubbles in spots.)

And here’s my favorite recipe! Makes one 9-inch crust

Basic Pie Crust

1 cup flour
pinch of salt
1/3 cup shortening
3-4 Tbsp cold water

Mix flour and salt in a medium or large bowl. Add the shortening, and use a pastry blender to cut it in to the flour (see tips above).

Once it has a nice crumbly texture, about the size of small peas, begin to add the water one tablespoon at a time. Continue adding water until the dough becomes sticky enough to form a ball. If it gets too sticky, add a little more flour.

Roll it into a ball, then put it on a floured surface and press it flat. You can wrap it in plastic wrap and refrigerate for about half an hour if desired (some say it makes it easier to roll out, and flakier). Use a floured rolling pin to roll out the dough. It should be about two inches larger than the pie pan. Slowly and gently fold the dough in fourths, transfer to the pie plate, and unfold. Mend any tears with wet fingers gently pressing the dough back together. Trim the edges, and you’re ready to fill the crust! Then just bake according to the directions for that pie.

If you’re making a pie that needs a pre-baked shell, use a fork to poke a few holes in the bottoms and sides, then bake it at 475 for about 15 minutes (check after 10). Let it cool, then fill.

Sorry if I disappointed anyone by not having cute ideas for the pie crust edges. I usually just use a fork to create a ridged look, or put a crust on top – which I’ve usually cut a heart or other shape in the center of. Maybe some day I’ll get more creative and share some decorative ideas! In the meantime, go make a pie and see how simple and delicious it is to have a homemade crust!

Apple Pie Bran Muffins

A few months ago, we decided to stop eating (and buying) cereal. I’m working on a post with lots of healthier alternatives (that are still fast!) but for now, I’ll give you another muffin recipe. A lot of muffins are basically just cake that we’ve convinced ourselves is ok to eat for breakfast. Not these babies!

apple pie bran muffins

its good for youThese are full of whole-grain goodness, protein, and no sugar or oil! (Well, no processed sugar – there is natural sugar in the apples and honey) Oh, and honey is basically a super food.

We make a batch of muffins almost every week, and it lasts about a week for breakfasts or snacks since we don’t eat them every day. They’re quick to make, really tasty, healthy, and filling. And one of the reasons I love to make muffins is that my little boy loves to help me make them!

making apple pie bran muffins

He’s such a good little helper in the kitchen! (When he’s not trying to snitch bites of dough or spilling things… Also, I don’t know what’s up with the tongue sticking out.) He stirs up all the dry ingredients for me while I mix the wet, and he puts the muffin liners in the pan, and he puts the ingredients away when we’re done with them. And he also sings the “Muffin Man” song while we make them. He’s pretty adorable sometimes.

This recipe is adapted from my Honey Orange Bran Muffins recipe, but I made enough changes that I decided to give these their own post.

Start by mixing up all the dry ingredients – the oat bran, whole wheat flour, baking soda and powder, cinnamon, nutmeg, and salt – in a large bowl.

Peel and chop the apple into small pieces.

apple cinnamon bran muffins recipe

Mix the wet ingredients – the yogurt, applesauce, eggs, honey, vanilla – in a smaller bowl. Fold in the apple chunks. Then pour the yogurt mixture in with the flour mixture, folding together until everything is moist.

honey orange bran muffins recipe 1


Spoon into muffin pan (I use paper liners) and bake at 350 for about 12 minutes.

apple pie bran muffins recipe

They should be turning golden on the top. Let them cool on a wire rack, and enjoy! These muffins tend to look a bit lumpier on top than the other ones, but they’re still delicious! (And healthier since I subbed out the sugar for applesauce!)

no sugar apple cinnamon bran muffins

Apple Pie Bran Muffins

1 cup oat bran (wheat works too)
1 cup whole wheat flour
1/2 tsp baking soda
1 tsp baking powder
1 tsp cinnamon
1/2 tsp nutmeg
pinch salt
1 cup Greek yogurt
2 eggs
1/4 cup applesauce
1/4 cup honey
1 tsp vanilla
1 small apple

1. Preheat oven to 350. Mix all dry ingredients – bran, flour, baking soda and powder, cinnamon, nutmeg, and salt – in a large bowl.

2. Peel and chop the apple into small pieces.

3. Mix all wet ingredients – yogurt, eggs, applesauce, honey, and vanilla – in smaller bowl. Fold in apple pieces. Pour into the large bowl with the dry ingredients, and stir until combined, and all ingredients are moist.

4. Spoon batter into greased muffin pan (or with paper liners). Fill each muffin about 3/4 full. Bake for about 12 minutes, or until tops begin to turn golden brown. Let cool on wire rack.

Makes about 18 muffins


Veggie Banana Bran Muffins (aka Sneaky Muffins)

A while back my toddler went through a super picky phase, especially when it came to eating vegetables.  He used to eat just about anything we gave him, but then he decided he basically only wanted to eat quesadillas and fruit.  I’ve been told this is really common with toddlers, but it’s still rather frustrating at times.  So I had to get a bit more sneaky.

toddler muffins

(I thought this was a good picture for being sneaky since the muffin kind of blends in with the counter! I know, I’m so clever.)

time saverOne of the things I really like about these muffins is that they freeze well!  So if you have lots of zucchini in your garden this summer, make a few batches and freeze them.  Or if you know they won’t get eaten fast enough, just pop them in a freezer bag and stick them in the freezer. You can even just pull out one or two at a time as needed.

They’re also actually quite tasty, so they’re definitely not just for toddlers. I just made them in a mini muffin pan so they were more toddler size, and were sneaking in some veggies for my picky little man. But let’s be honest, we can probably all use some more veggies in our lives! But with the carrots and spices, they’re almost like mini carrot cakes.

its good for you Carrots and zucchini are both full of vitamins of course; bran gives you lots of fiber; and there’s only a little sugar since the bananas naturally sweeten them. In fact, you could probably make them without any sugar at all, or even substitute applesauce (I’m planning to try that as soon as I have some more zucchini from my garden!)

banana carrot zucchini bran muffins 2

Start by shredding the carrots and zucchini in a food processor or with a box grater. Mix the butter and sugar, then add the bananas, eggs, and shredded veggies. The carrots and zucchini will get kind of stuck on the beaters, so you might have to stop occasionally and scrape them.

Mix in the dry ingredients, then spoon the batter into a muffin pan. Bake until they’re golden on top, let them cool, and enjoy!

banana carrot zucchini bran muffins

Sneaky Muffins (Banana Veggie Bran Muffins)

1/2 cup butter, softened
1/4 cup brown sugar
2 large, very ripe bananas
1 small-medium zucchini, shredded
2 medium carrots, shredded
2 eggs
1 cup flour
1/2 cup oat or wheat bran
1 tsp baking soda
1 tsp cinnamon
1/2 tsp nutmeg
1/2 tsp salt

1. Preheat oven to 375 F.

2. With an electric mixer, mix butter and sugar together until smooth.  Add bananas, zucchini, carrots, and eggs, and mix well, until the bananas are smoothly mashed into the dough.

3. Add remaining ingredients, and mix until just combined.

4. Spoon batter into greased muffin or mini muffin pan.  Fill each muffin 2/3 to 3/4 full.

5. Bake for 13-15 minutes for mini muffins, or 15-18 minutes for regular muffins.  Cool in the pan for 10 minutes, then transfer to a wire rack to finish cooling.

Yield: about 2 dozen mini muffins or 1 dozen regular muffins

change it upYou could also add raisins, chopped apples, or flax seed.


*I originally published this recipe on my other blog – A Song of Sixpence. It has more crafty/mommy ideas and such, so I decided to re-blog this recipe here.

Honey Oat Bread with Sunflower Seeds

Who ever came up with the phrase “best thing since sliced bread” clearly wasn’t talking about the taste! Because let’s be honest – homemade (or even bakery) bread tastes soooooo much better than basically any sliced “bread” we buy at the grocery store. That stuff is mostly air with some overly-processed carbs and other random junk trying to trick you into thinking it’s bread.

This is bread.

honey whole wheat oat bread with sunflower seeds

Doesn’t it just look so thick and delicious? Nice crisp crust with just a little sticky honey, and soft and chewy inside. We ate the whole loaf within two days. And we would have eaten it faster except my husband was hardly home during those two days!

I don’t make homemade bread very often. In fact, this was my first attempt in a few years. But it turned out so well, and was actually pretty easy to make, that I think we’ll be making lots more! Plus, my two-year-old had a blast helping me knead the dough!

kneading bread 1 kneading bread 2

See, kids can help in the kitchen! Granted, he did get flour all over himself… but he was actually pretty helpful with the kneading.


honey whole wheat oat bread

I can’t actually take credit for this recipe – I used this wonderful recipe from Bakingdom.

However, I did make a few changes. I used whole wheat flour instead of all-purpose flour. And it turned out great! I also sprinkled sunflower seeds on top of the bread along with the oats suggested in the original recipe. The seeds added a nice nutty flavor that complemented the whole wheat and honey flavors beautifully.

its good for youUsing whole wheat flour instead of all-purpose flour means lots more fiber and vitamins in your bread! Add that to the oats (bring on the fiber) and sunflower seeds (healthy fats and proteins) and honey (tons of vitamins, minerals, etc.) and you have a bread that’s delicious and nourishing!

honey oat bread with sunflower seeds

It hasn’t even baked yet, and it already looks scrumptious!

If you’re intimidated by making bread (I was!) or envision spending hours in the kitchen kneading, try out this recipe. It’s really easy and doesn’t take much time at all (other than waiting for it to rise). I was pleasantly surprised by how quick, simple, and delicious this bread was!

Soft Honey Oat Bread by Bakingdom

whole wheat honey oat bread with sunflower seeds

The wonderfully golden bread after baking. I could hardly wait to slice into it!

I’m testing out a few more bread recipes over the next week, so I’ll be sure to let you know how those turn out! Hopefully with a little more practice, I’ll be adapting and coming up with my own recipes soon!

Honey Orange Bran Muffins

A bran muffin that doesn’t taste like cardboard? Yes, it’s possible. And delicious. And healthy.

honey orange blackberry bran muffins 1

A few things I love about these muffins:

1. They’re delicious! Seriously, I want to eat them all the time.

2. My little boy loves to help me make them. He stirs up all the dry ingredients, and usually doesn’t even spill much because we use a giant bowl!

3. its good for youThey’re actually pretty good for you! They have a fair amount of protein from the Greek yogurt and the eggs, plus the whole grains which have some protein. And they’re made with whole grains! Lots of fiber and other goodness! There’s very little processed sugar because the honey and orange zest give them flavor and sweetness. Oh, and honey is also super good for you!

4. They’re pretty quick to make, and then you have breakfast/snacks for several days. They also freeze pretty well, so you could make a big batch and freeze them, and then just pop them a few in the toaster oven as needed.

orange honey blackberry whole wheat bran muffins

Okay, done with my rant about why these muffins are great. On to how to make them:

The first thing you’ll want to do is zest an orange. You can use a box grater, a citrus zester, or this awesome grater I got from Ikea. (sorry for the random product shout out, but seriously, it’s grate. I mean great.)

honey orange bran muffins recipe 2

A little tip for zesting: Try not to push too hard. You don’t want to get too much of the lighter pulpy part under the peel because it tends to be more bitter.

Next you’ll mix all the dry ingredients – oat bran, whole wheat flour, sugar, baking soda, baking powder, and salt – in a large bowl. Mix the wet ingredients – yogurt, eggs, vanilla, oil, honey, and orange zest – in a smaller bowl.

honey orange bran muffins recipe 1

Pour the wet ingredients into the larger bowl with the dry ingredients, and mix together with a wooden spoon. Just mix until all the dry ingredients are wet – don’t over mix or mix too vigorously. (I don’t let my two-year-old do this part.)

honey orange bran muffins recipe 3

(Not quite mixed enough yet)

If you’re adding any fruit, gently fold it in. Then spoon the batter into a muffin pan lined with paper liners. Fill each one about 2/3 full.

honey orange bran muffins recipe 4

Bake in the oven at 375 for 12-15 minutes. Let cool for a few minutes in the muffin pan, then move to a cooling rack.

honey orange bran muffins 1

Honey Orange Bran Muffins

Ingredients:

1 cup oat bran
1 cup whole wheat flour
1/2 tsp baking soda
1 tsp baking powder
pinch of salt
1/4 cup sugar
1 cup plain Greek yogurt
2 Tbsp vegetable oil
1 tsp vanilla
2 eggs
1/4 cup honey
zest of 1 orange (1-2 Tbsp)

1. Preheat oven to 375. Mix bran, flour, baking soda, baking powder, salt, and sugar in a large bowl.

2. Mix yogurt, oil, vanilla, eggs, honey, and orange zest in a smaller bowl.

3. Gently fold wet ingredients into dry ingredients. Mix with a wooden spoon until just combined, and all dry ingredients are wet. (If you’re adding any fruit, add it now.)

4. Spoon batter into a muffin pan with paper liners, filling each about 2/3 full. Bake for 12-15 minutes, until the tops are golden brown. Remove from oven, and let cool a few minutes before moving to a cooling rack to finish cooling.

Yield: About 1 dozen muffins.

honey orange blackberry bran muffins

change it upMix in 1 cup of blackberries or blueberries, 1/2 cup craisins, or 1 tsp cloves for variety! (If you add 1 cup of fruit, you will get about 18 muffins instead of 12.)