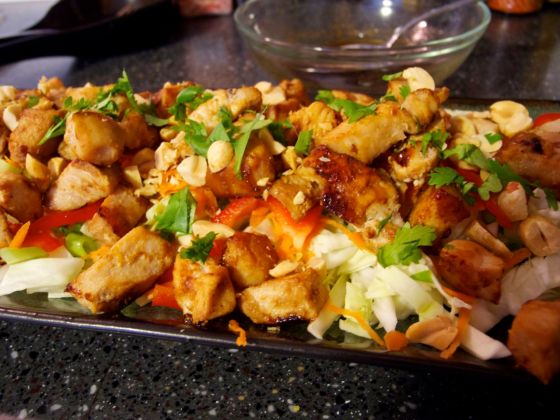
chicken pad thai salad

I love summer, but I hate cooking in the summer! It’s just too hot to have the oven or stove on for very long, and some days are definitely too hot to eat a hot meal. That’s one of the reasons I love this lighter, fresher, veggie-packed version of the classic Thai dish.

chicken pad thai salad

time saverAnother nice thing about this recipe is that it can all be prepped ahead of time, which makes it great for taking to a summer picnic or barbecue, or just for those days that you won’t have time to cook for dinner. Just don’t pour on the dressing until you’re ready to eat it, and the salad should stay nice and crisp for up to about 24 hours.  You can also marinate the chicken for up to about 24 hours, so you can get it ready when you have time and then just leave it until it’s almost time to eat!

its good for youBy replacing the noodles with cabbage and carrots, you’re eliminating processed carbs and trading them for fresh vegetables packed with nutrients and vitamins! And cabbage is one of many vegetables that may help with lowering cholesterol and preventing some types of cancer!

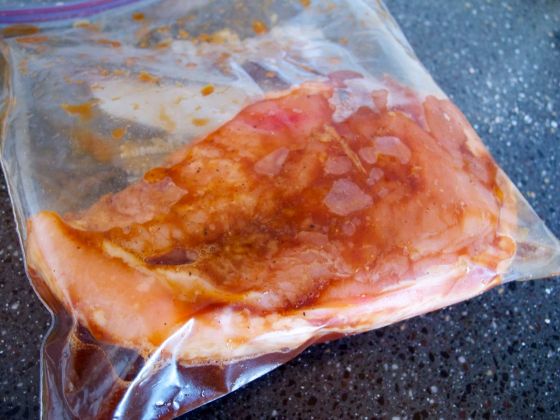
For the chicken, put the raw chicken in a gallon-size bag, pour in the soy sauce, squeeze in the lime juice, crush in the garlic, and toss in some salt and pepper. Then just squish everything around for a minute until it seems mixed and the chicken coated, and stick it in the fridge until you’re ready to cook the chicken.

chicken pad thai salad recipe

(Mmm… delicious! Is there any way to make raw chicken not look disgusting? If so, I certainly haven’t figured it out. But trust me, once it’s cooked it will taste great!)

Now you just need to chop up the cabbage, peppers, green onions, peanuts, and cilantro, and shred the carrots.

pad thai salad recipe

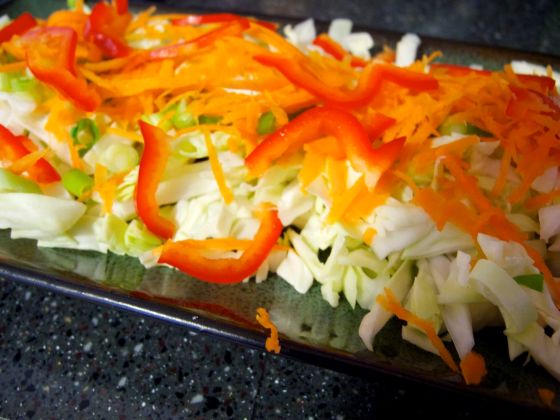
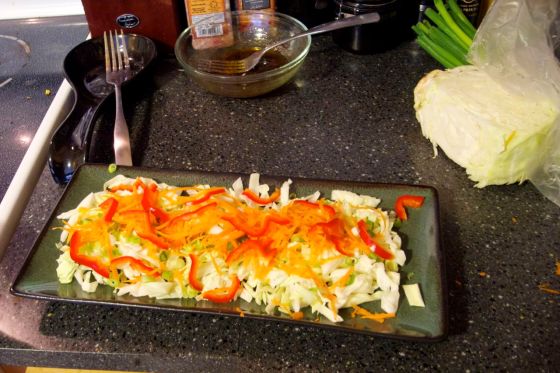
I layered the salad (I thought it looked pretty) but you can just toss it in a bowl if that’s easier. You can chop the veggies while the chicken’s marinating, or wait until it’s cooking.

pad thai salad

You can also mix up the salad dressing while you wait for the chicken. Just mix the soy sauce, oil, vinegar, lime juice, brown sugar, and cayenne in a bowl. You’ll want to mix it up again (I’ve found forks work best) just before serving – the oil tends to separate.

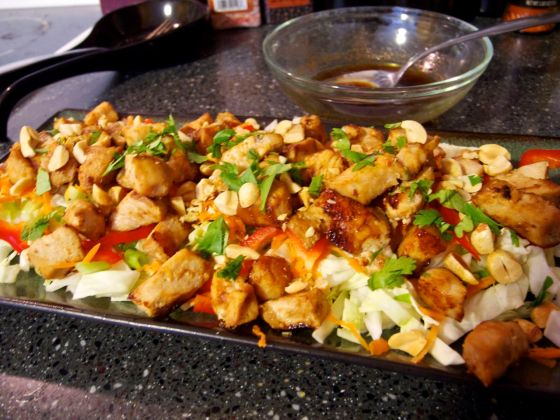
When you’re ready to cook the chicken, you can either chop it up and cook it in a frying pan on the stove, or grill it and chop it up after it’s cooked. Then add it to the salad, top with the dressing, and enjoy!

pad thai chicken salad

Chicken Pad Thai Salad

For the chicken:

1 lb raw chicken
1/4 cup soy sauce
1 lime
1-2 cloves garlic
pinch salt and pepper

For the salad:

1 head green cabbage
2 carrots
2 green onions
1/2 red bell pepper
1/2 cup peanuts
1/2 cup bean sprouts (optional)
1/4 cup cilantro

For the dressing:

1 Tbsp olive oil
1 Tbsp vinegar
1 Tbsp soy sauce
1 lime
1 tsp brown sugar
pinch cayenne pepper

1. Put all the ingredients for the chicken in a gallon-size plastic bag and seal. Squish it around to make sure the ingredients in the marinade are mixed, and place in the refrigerator for at least half an hour and up to 24 hours.

2. Chop up all the vegetables (I shredded the carrots) for the salad, and layer on a platter or mix in a large salad bowl.

3. Mix all the ingredients for the salad dressing in a small bowl. Be sure to mix again before pouring on the salad, as the oil tends to separate.

4. Cook the chicken either on the stove or on the grill. If on the stove, I recommend chopping it up first. Allow to cool a bit, then add to salad. Pour dressing on top and serve.
Moroccan couscous and roasted vegetables

I have a slight obsession with Mediterranean food. One of my dream vacations is to go on a Mediterranean cruise because I would love to see all the art and architecture and such, and I want to try all the amazing food! So many beautiful combinations of herbs and spices. I just love it.

A while ago I found a recipe for Moroccan chicken from the Betty Crocker cookbook, and it was amazing. We make it all the time. So I decided to take the basic ideas from that recipe, and adapt it to make Moroccan spiced couscous, and some roasted veggies to go with it.

moroccan couscous and roasted vegetables

its good for youUse whole wheat couscous for a healthier, higher-fiber meal. And all the vegetables are of course so healthy! There’s very little salt since there are so many wonderful spices, and the only fat is from the olive oil, which is also good for you. And of course, it’s delicious!

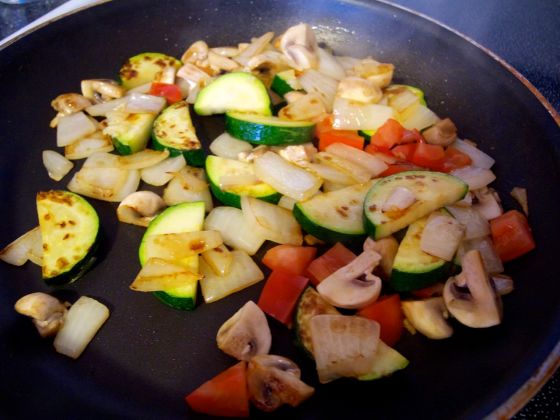
Put a medium pot on the stove with the water and olive oil, and bring to a boil. In the meantime, chop up all the vegetables, and toss them in a frying pan with olive oil, and a little salt and pepper if desired. Toss regularly, and cook until the onions are tender and the vegetables are getting nicely browned/roasted.

pan roasted vegetables

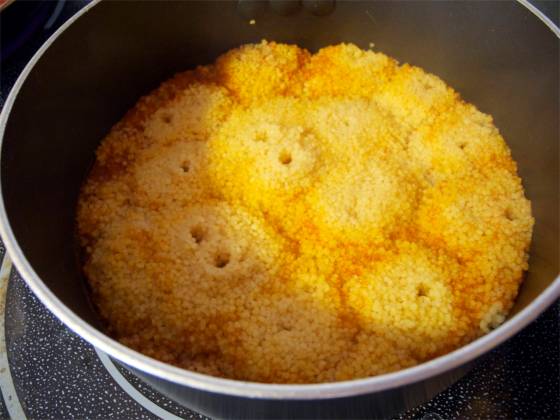
Once the water boils, add the spices and couscous, remove from heat and cover with a lid. Let it sit for about five minutes, then fluff the couscous with a fork.

moroccan couscous

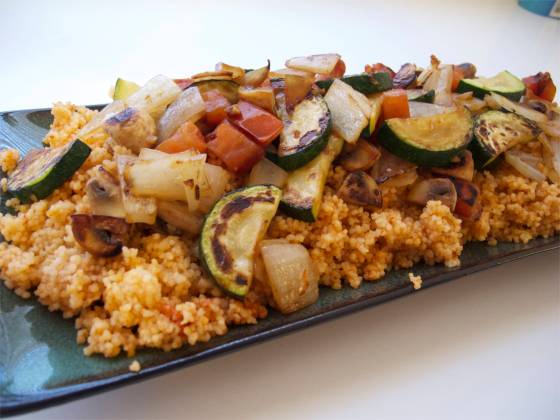
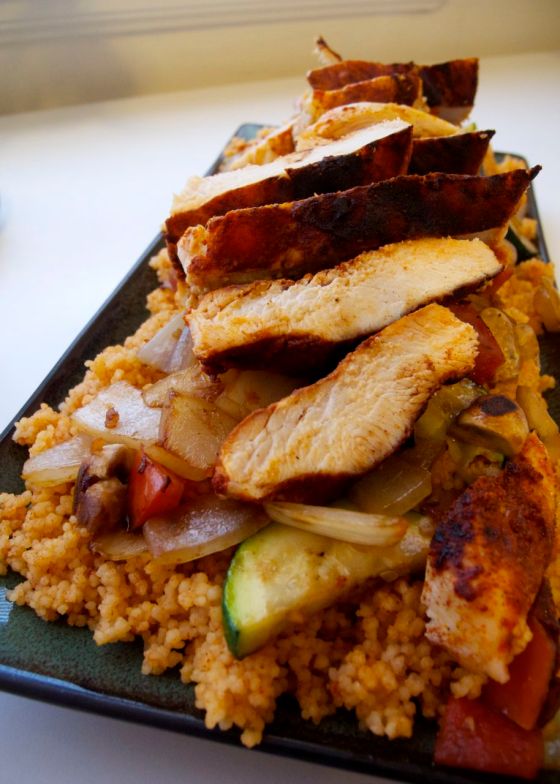
Serve the roasted veggies with the couscous, along with Moroccan grilled chicken and sliced papaya, if desired. I know, it sounds a little weird to serve papaya with this, but trust me. It’s amazing. The flavors complement each other wonderfully.

moroccan chicken couscous and roasted veggies

Moroccan Couscous and Roasted Veggies

1 Tbsp paprika
1 tsp cumin
1/2 tsp cinnamon
1/4 tsp allspice
pinch of salt
1 Tbsp olive oil
2 cups water
1 cup couscous
1/2 medium onion
1 medium zucchini
8 mushrooms
1/2 red bell pepper
1 small tomato
1-2 Tbsp olive oil

1. Mix all the spices together in a small bowl. In a medium pot, bring the water and olive oil to a boil. Once it comes to a boil, remove from heat, add spice mix and couscous, and cover with a lid for about five minutes.

2. Chop all the vegetables, and toss in a large frying pan with the olive oil. Cook, tossing regularly, until onions are tender and vegetables look nicely roasted.

3. Fluff the couscous with a fork, and serve with the vegetables. Serve with Moroccan grilled chicken and sliced papaya if desired.

For the Moroccan grilled chicken, use the spice mix from above, rub onto a chicken breast, and cook on a grill or frying pan. Slice and serve with the couscous and vegetables.

change it upYou could also add eggplant or artichoke hearts if desired

Crispy Cajun Chicken with Creamy Avocado Pasta

Apparently I’ve gotten really lazy about posting new recipes lately… I’ll blame it on the fact that I’ve had allergies or a cold for about a month now. But really, I’m probably just lazy. I have several new recipes that I’ve even taken pictures of, I just haven’t gotten around to sorting/editing the pictures and writing up a blog post. Maybe I’ll get a burst of motivation and have lots of new posts soon! Or more likely they’ll trickle in eventually…

But here’s a recipe for the delicious Cajun-inspired meal I made last night. It was so simple, and so delicious, I had to share it!

Cajun chicken pasta with creamy avocado sauce

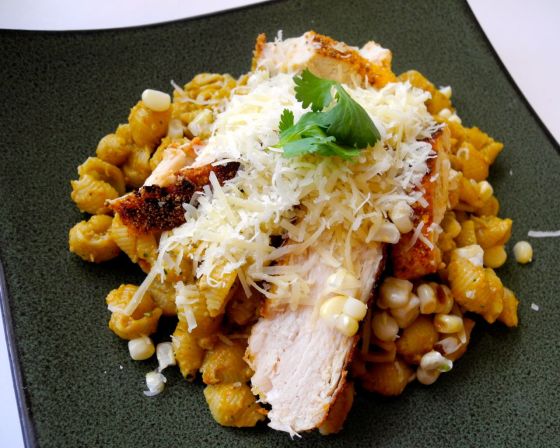
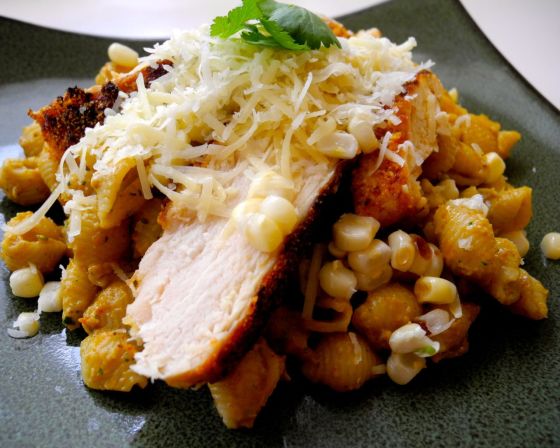
Crispy Cajun chicken, pasta with a creamy avocado sauce, grilled corn, and all topped with sharp white cheddar.

To get started, put a pot of water on the stove to boil for the pasta. Then flatten out the chicken breast with a meat mallet.

time saverI love meat mallets! Seriously, one of my favorite kitchen gadgets! Cooking a whole chicken breast on the stove or grill can take a long time, especially the huge, thick ones you always seem to get these days. And cutting raw chicken is 1) gross and 2) time consuming. But flatten it out a bit with a meat mallet, and it cooks so much faster! Then if you need it in smaller pieces, slice it up after it’s cooked.

crispy Cajun chicken recipe

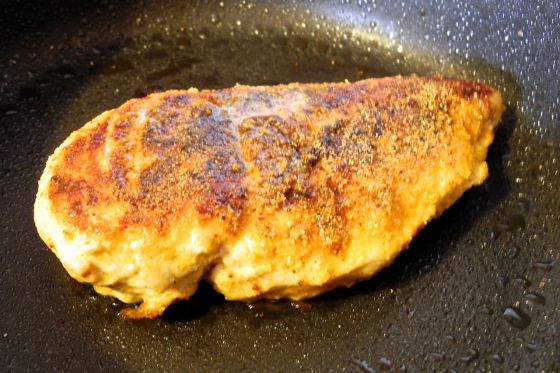
Then rub the Cajun seasoning and corn meal into the chicken, and toss it in a pan with a little olive oil.

crispy Cajun chicken

Once the bottom side is nice and crispy and browned, turn it over and keep cooking until golden, or even slightly blackened. The corn meal gives it a nice crispy texture on the outside.

While the chicken is cooking, get the pasta cooking, grill or pan-roast the corn, and make the sauce. To make the sauce, put the avocado, tomato, lime juice, garlic, cilantro, and Cajun seasoning in the blender, and puree until smooth. (I love using avocados to make “cream” sauce – they’re so creamy, but with that delicious avocado flavor!)

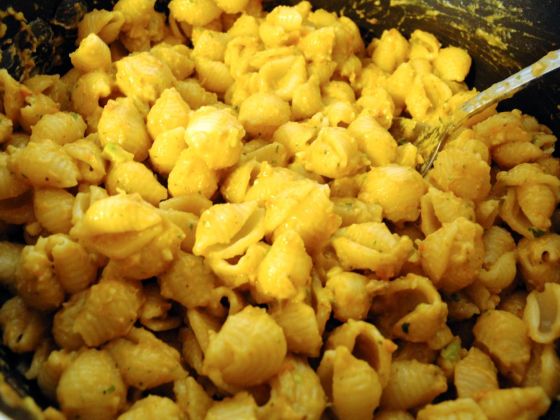
creamy avocado Cajun pasta

When the pasta is done cooking, drain it and return it to the pan. Stir in the sauce, and heat through. It doesn’t need to really cook, just heat.

crispy Cajun chicken pasta

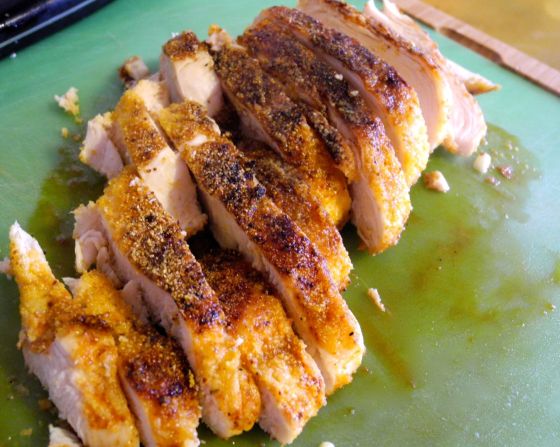
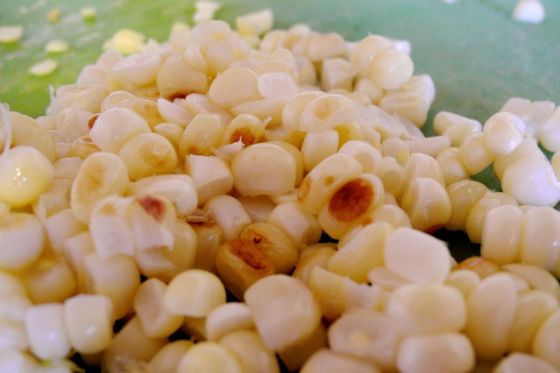
Slice the chicken, cut the kernels from the corn, and shred the cheese.

grilled corn

Serve the pasta onto plates, and top with chicken, corn, cheese, and a few extra sprigs of cilantro. Enjoy!

crispy Cajun chicken with creamy avocado pasta

I also make my own Cajun seasoning because the packaged stuff is soooo full of salt and other random preservatives, which is silly because it’s just spices and spices don’t have them. Anyway, you can just use a store-bought Cajun seasoning, or make your own. This will make more than you need for this recipe, but you can save it for other recipes, like Cajun fries!

Cajun Seasoning

1 Tbsp chili powder
1 Tbsp paprika
1/2 tsp onion powder
1/2 tsp garlic powder
1/2 tsp salt
1/2 tsp oregano
1/4 tsp bay leaves
1/4 tsp cayenne pepper
1/4 tsp pepper

And now for the main event:

Crispy Cajun Chicken with Creamy Avocado Pasta and Roasted Corn

1 large chicken breast
1 tsp Cajun seasoning
1 Tbsp corn meal
1 Tbsp olive oil
1 cup dry pasta, such as bow ties or shells
1 large avocado
1 small tomato
1 lime
1/2 cup fresh cilantro
1 clove garlic
1 tsp Cajun seasoning
1 ear corn
1/2 cup shredded sharp white cheddar

1. Put a pot of water on the stove to boil for the pasta. Heat the olive oil in a frying pan. Flatten the chicken with a meat mallet, and rub with the Cajun seasoning and corn meal, and add to the frying pan. Cook until golden brown on the bottom, then turn and continue cooking.

2. When the water come to a boil, add the pasta and cook according to package directions.

3. While the chicken and pasta cook, grill the corn. (I used a George Forman grill, but you can just put it in a frying pan and turn it occasionally.)

4. Make the sauce by putting the avocado, tomato, cilantro, lime juice, Cajun seasoning, and garlic in the blender. Puree until smooth.

5. When the pasta is done, drain and return to pan. Stir in the sauce and heat through. Slice the chicken and cut the kernels from the corn.

6. Serve the pasta onto plates and top with chicken, corn, and shredded cheese.

Makes about 4 servings.

One note – because the sauce is avocado-based, it doesn’t reheat very well. It can be saved and reheated, but it’s much better eaten fresh!

Mango Avocado Salsa

Mexican food was a staple of my diet all growing up. Mangos, unfortunately, were not. So now I find any excuse I can to sneak mangos into my meals (or salsa) because they’re rather delicious.

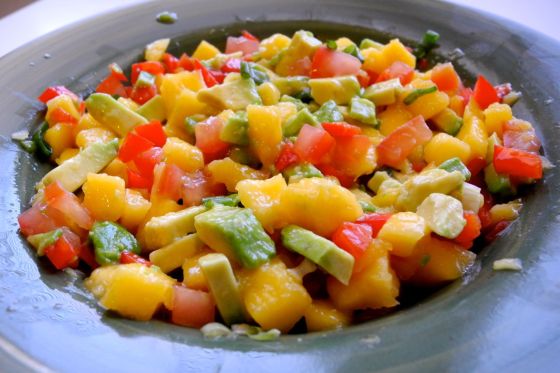
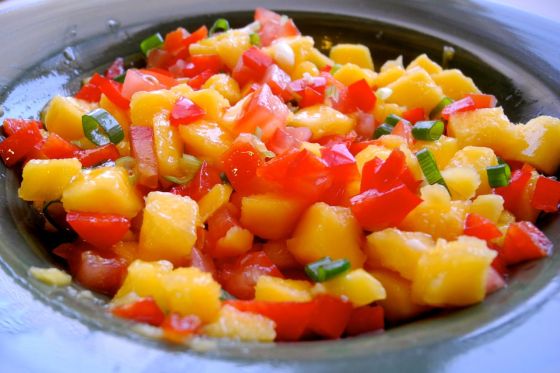
mango avocado salsa

If you shop at Costco, you’ve probably seen the mango salsa they sell there. It’s pretty good, but nothing ever quite compares to making it fresh. Especially when you can find good mangos for a good price! One of the keys to making good mango salsa is starting with good mangos. How do you choose a good mango? Find one with as little green as possible! The more red, the more delicious! It should be mostly red, with some yellow (and probably a little green, cuz let’s face it – you’re probably not going to find a perfect one unless you go to the tropics) and it should be somewhat firm but not hard.

So once you’ve got your mangos, you might be wondering what exactly to do with them. They can be a bit tricky, with their big, weird-shaped seed in the middle, and the skin that needs peeled off, but once peeled the mangos are super slippery. Well, let me share what I’ve found to be the easiest, fastest way to cut up a mango:

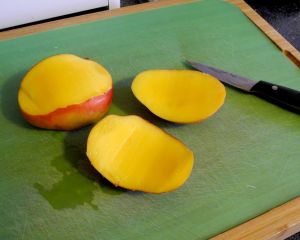
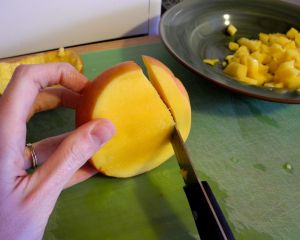
time saverStart by slicing down one side of the seed, starting at the top towards the middle, and curving outward around the seed, down to the bottom.

how to cut a mango 1

Repeat on the other side, so you end up with two slightly curved pieces that you cut off, and the seed (with some usable fruit still).

how to cut a mango 2

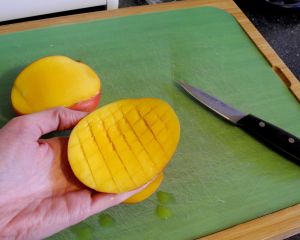
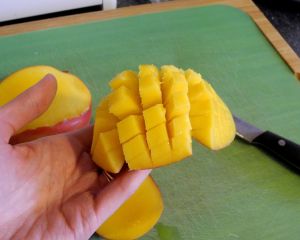
Cut a cross-hatch pattern into the fruit, cutting dow to the skin but not through.

how to cut a mango 3

Then flip it inside out, pushing the fruit up and out of the skin. Some pieces will probably just fall out, and the rest you can just run the paring knife as close to the skin as possible.

how to cut a mango 4

Repeat these steps on the other two sides of the seed (there is much less fruit here, but still enough to be worthwhile).

how to cut a mango 5

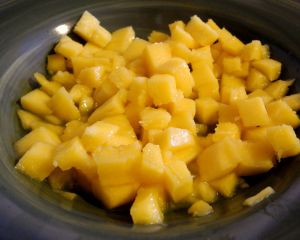
And now you’ve got lots of delicious mango bits!

mango salsa recipe

Now it’s salsa time! Chop up the green onion, crush the garlic, seed and chop the tomato and pepper, and cut up the avocado.

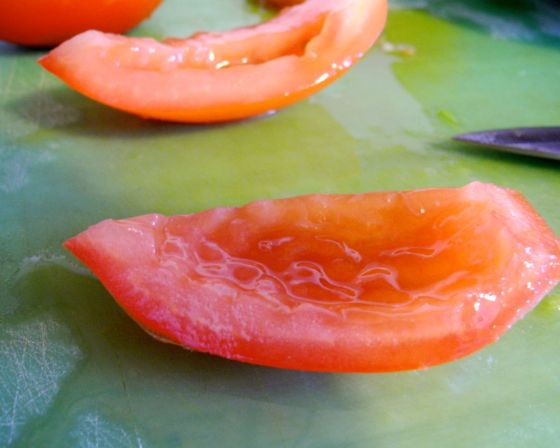
To seed the tomato, just cut it in quarters lengthwise, and then run a knife from one end to the other, just under the seeds, and they should fall right off.

mango salsa recipe deseed tomato

To cut up the avocado, basically follow the same method as cutting the mango, but just slice it in half instead of cutting around the seed. Or look at this post for some pictures and tips.

Stir everything up, let it sit for at least 15 minutes so the flavors can mix a bit, and enjoy!

mango salsa

(I know, it doesn’t have any avocado yet here… but it’s still delicious and beautifully colorful!)

Just eat it on chips, or put it on tacos, burritos, quesadillas, nachos….

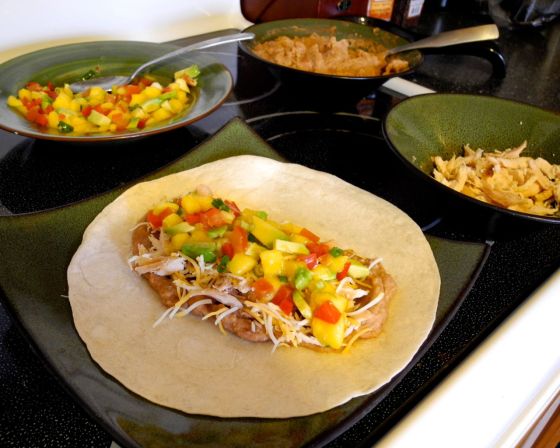
mango avocado salsa burritos

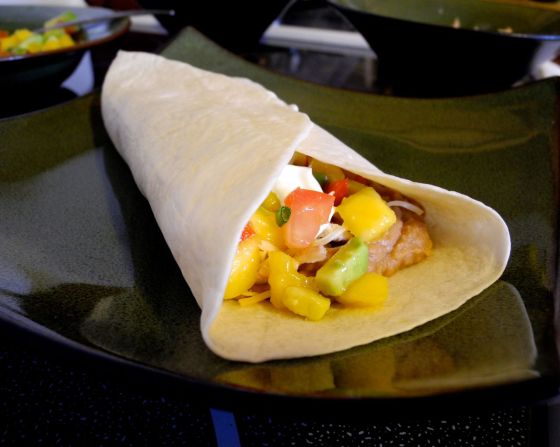
We made chicken burritos with leftover rotisserie chicken, some refried bean, and the mango avocado salsa, and it was super yummy! So simple, and a great use for any leftover chicken!

mango avocado salsa chicken burrito

Mango Avocado Salsa

2 large ripe mangos
1 roma (or other small-medium) tomato
1 large avocado
1 red pepper
2 green onions
2 garlic cloves

1. Peel and chop the mangos (see tips above). Seed and chop the tomato and pepper. Cut up the avocado. Slice the green onions. Mince or crush the garlic. Mix all ingredients in a bowl.

2. Let sit for about 15 minutes (or longer if you want) for the flavors to mix. Stir and serve!

Makes about 2-3 cups salsa.

change it upAdd a jalapeno or other chili pepper for a spicier salsa. Or add some chopped cilantro! (I just didn’t because my husband doesn’t like it!)

Lentil Vegetable Coconut Korma

Somehow I made it through more than twenty years of life without ever eating Indian food. It’s tragic, really. So to make up for lost time, we eat a lot of Indian food now. It’s just so delicious!

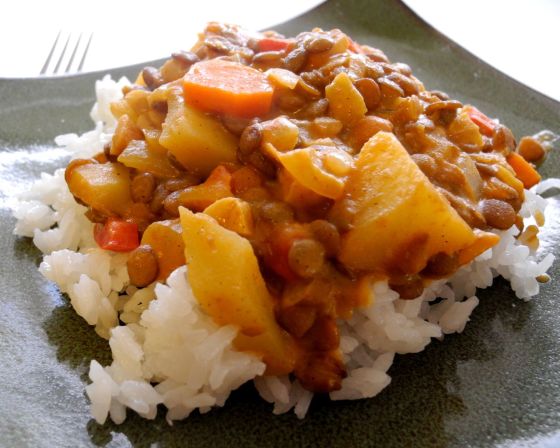
lentil vegetable coconut korma

I’ve experimented with lots of different recipes, but my favorites to make always use coconut milk as a base for the sauce. It gives it so much flavor and makes it nice and creamy! Plus, of my experimental recipes, the ones with coconut milk have always turned out the best. Maybe some day I’ll figure out how to make some other types of Indian food… but coconut milk is just so good I don’t really mind.

We’ve been trying to have at least a few dinners each week without meat. It cuts down on cost significantly, and it’s generally healthier to eat less meat than most people eat. This meal still gets you a nice amount of protein with the lentils and cashews. But you could easily add/substitute chicken, fish, etc. That’s one of my favorite things about this recipe – it’s so versatile! You could honestly put just about anything in there, and it would taste good!

its good for youLentils have tons of soluble fiber (great for lowering cholesterol, filling you up, and stabilizing blood sugar, among other things) and are also high in protein. Carrots have lots of vitamins and antioxidants. Coconut milk has lots of vitamins and minerals, but is a bit high in saturated fats (although with no meat, and spread between at least six servings, it’s not bad.)

vegetable korma recipe

Get the lentils started on the stove while you chop up the vegetables.

vegetable korma with lentils recipe

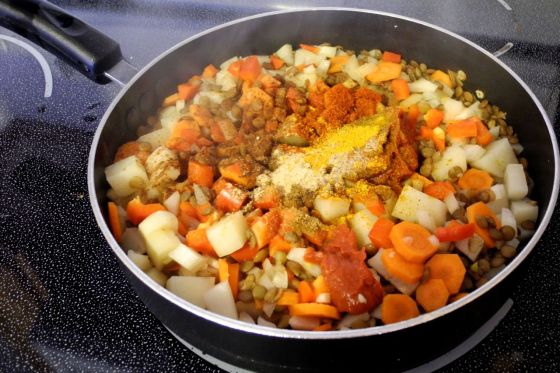
Add the vegetables and spices, stir, and let it simmer for about 20 minutes, until the lentils and veggies are soft. (If you can find a korma spice mix at the store, that should work just fine. Just check the sodium – a lot of packaged spice mixes have tons of salt!)

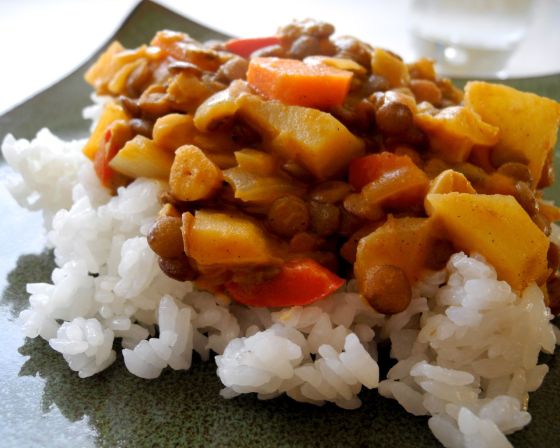
coconut korma with lentils and vegetables

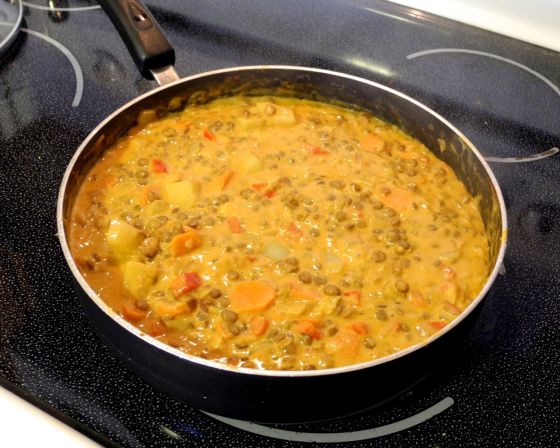
Add the tomato paste and coconut milk and stir well. Let it simmer for about 10 minutes. Stir in the cashews. Do a taste test to see if you need to add any more spices or salt. Then serve over rice.

vegetable coconut korma with lentils

Lentil and Vegetable Coconut Korma

1 cup lentils
3 cups water
1 onion
2 cloves garlic
1 red pepper
2 carrots
2 small potatoes
1 tsp curry powder
1/2 tsp cinnamon
1/2 tsp cardamom
1/2 tsp ginger
1 tsp paprika
1/4 tsp cayenne pepper (more if you like it hot)
1/4 tsp saffron
3 Tbsp tomato paste
1 can coconut milk
1/4 cashews, roughly chopped
salt to taste

1. Combine lentils and water in a large pan, and bring to boil over medium-high heat. Once it boils, reduce heat to low.

2. While lentils begin cooking, chop the onion, pepper, carrots, and potatoes. Add to the lentils. Crush in the garlic, and add the spices. Let simmer for about 20 minutes, until lentils and vegetables are soft.

3. Stir in tomato paste and coconut milk. Simmer another 10 minutes.

4. Add cashews. Check the flavor, and add salt or more spices if desired. Serve over rice.

Makes about 6 servings

change it upAdd pineapple chunks for a sweeter curry. Add or substitute sweet potatoes, cauliflower, or other vegetables. Add chicken, fish, or beef for a “heartier” meal.

Maple Balsamic Salmon with Lemon Butternut Squash Orzo

This might make me a total nerd, but I love getting good deals! My husband makes fun of me because I (quite) frequently tell him about the great deals I get at the grocery store. I think part of it is justifying the things I buy, even though he’s far less concerned about it than I am. I just feel like if we’re eating something that’s normally pretty expensive, I have to explain that I got it for super cheap!

Like this beautiful salmon filet that was plenty of meat for a meal for our family – and cost less than $2!

maple balsamic salmon

Seriously, how could I not buy it?? I didn’t have a choice!

Plus, then I got to try out this fabulous recipe my sister told me about. It’s adapted from this recipe she found on the Mayo Clinic DASH Diet. (There are actually tons of great, healthy recipes on there! Go check it out!)

save moneyHow did I get salmon for that cheap you ask? Look for the “manager’s special” stickers on meat – that means it’s super marked down because the sell by date is only a day or two away. I buy most of my meat that way! If you’re not going to use it right away, just freeze it!

Back to this recipe – not only is it good for you, it’s also super easy! I’m still a little intimidated by fish; we never ate it growing up, so I don’t have a lot of experience with it. But this recipe is seriously fool proof.

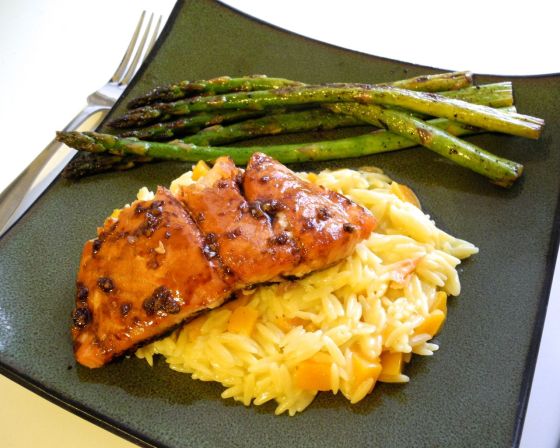
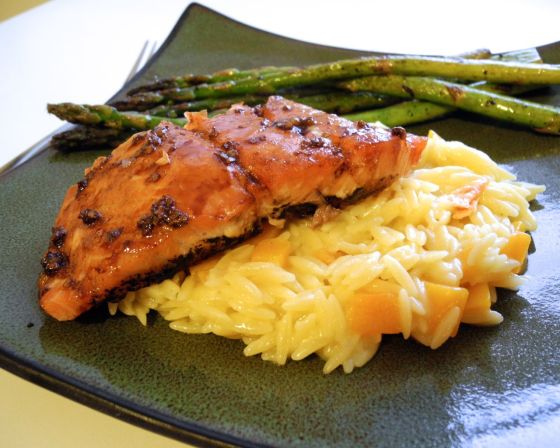
creamy lemon butternut orzo maple balsamic salmon and asparagus

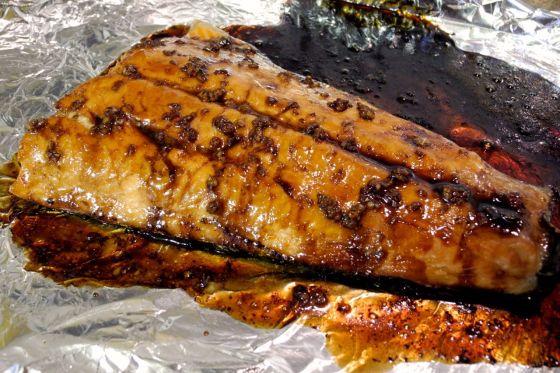
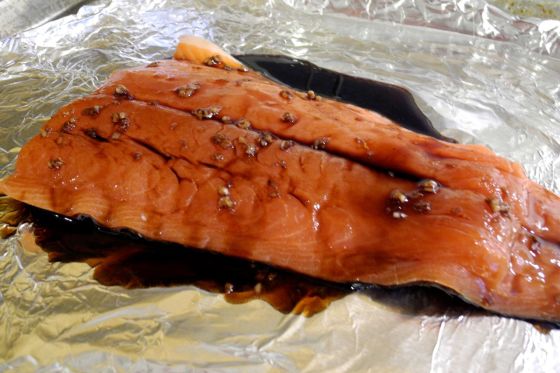
Just mix the maple syrup, balsamic vinegar, and crushed garlic in a small pan on the stove. Heat it until it just starts to boil, stirring frequently. Then use about half of it to glaze the salmon, and pop it in the oven! Be sure to put the salmon on foil – the glaze gets really sticky and you do not want to clean it off the pan!

maple and balsamic vinegar glazed salmon

After 10 minutes, spoon most of the rest of the glaze on top of the salmon, and put it back in the oven. After another 10 minutes, check to see if it’s done. It should be nice and flaky. If it’s not, spoon whatever’s left of the glaze on top, and cook it for a few more minutes.

While the salmon is cooking, you can make the orzo.

creamy lemon butternut squash orzo

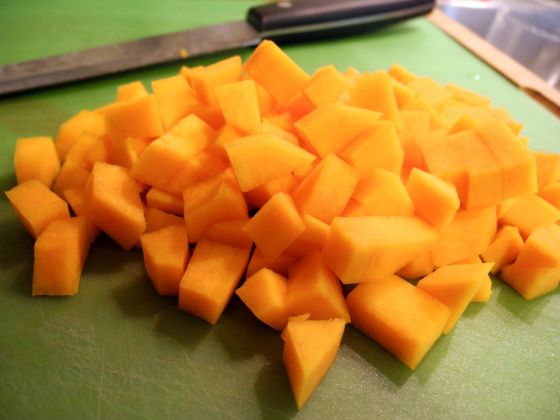
Start by cutting up the squash. You’ll want about 1 cup of squash cut into small chunks. Put it in a small pot with enough water to cover, and cook on the stove until tender – about 10 minutes.

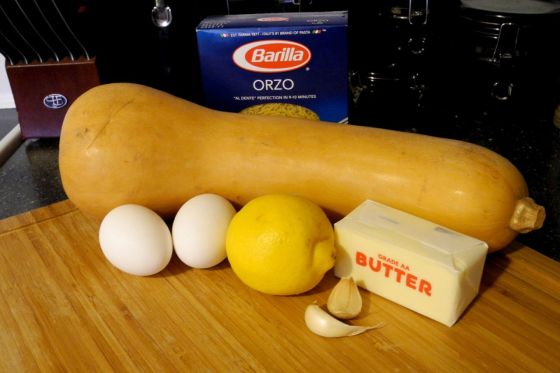
Just a side note on the squash – I used slightly less than half of the squash pictured above for this recipe. I used the rest to make some baby food! Also, when buying a butternut squash, find one with a nice long neck. That’s where most of the usable “meat” is.

butternut squash

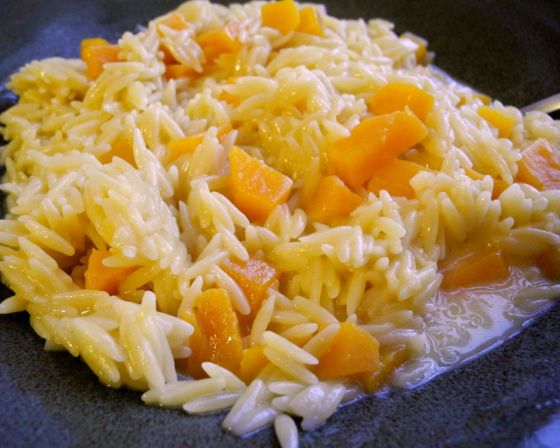
Cook the orzo according to the package directions, then add the cooked butternut squash.

For the sauce, squeeze the juice of one lemon into a bowl. Crush in 1-2 cloves of garlic. Mix in 2 egg yolks.

creamy lemon butter sauce

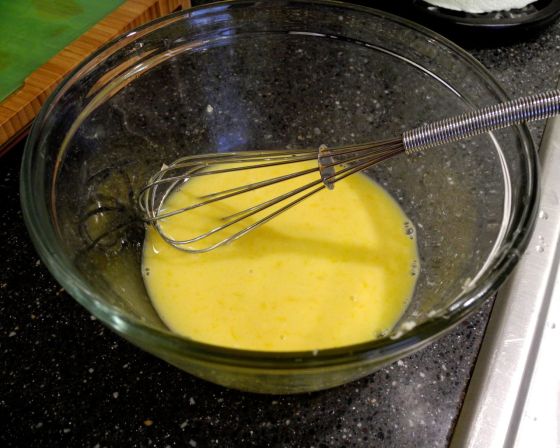
Melt 1 stick (1/2 cup) of butter. Make sure it’s quite hot – this is what cooks the egg. Slowly, using a whisk, mix the hot butter into the lemon and egg mixture. Be patient, and keep whisking the whole time. This keeps the yolks from scrambling, and makes a smooth, creamy sauce. Pour on the orzo and squash, stir it up so the sauce evenly coats everything, and serve with the salmon!

creamy lemon orzo with butternut squash

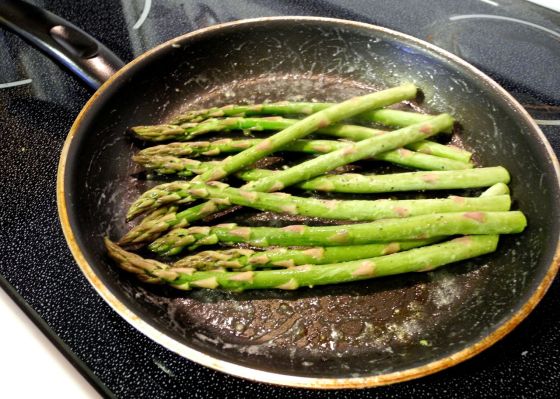
We also had lemon butter asparagus: Just melt a little butter in a large frying pan, toss in the asparagus, and squeeze in a little lemon juice. Saute until tender-crisp.

lemon butter asparagus

its good for you So many healthy things in this meal! First of all, everything is all-natural except the orzo, which you could certainly buy an all-natural pasta. I even used real maple syrup! There is no salt. None. (Unless you use salted butter, which would add a small amount) But still tons of flavor. Salmon is full of vitamins and Omega-3s. Butternut squash has tons of fiber, vitamin C, and loads of other vitamins. And asparagus give you more fiber, vitamins, antioxidants, and lots of other goodness.

There is a fair amount of butter… but when split between all the servings, it’s not that much per serving. Plus, some natural fats will help your body process and use all those vitamins!

maple balsamic salmon lemon butternut squash orzo and asapragus


Maple Balsamic Salmon

~1 lb salmon filet
1/4 c pure maple syrup
1/4 c balsamic vinegar
1-2 cloves garlic

1. Preheat oven to 375. Combine syrup, vinegar, and crushed garlic in a small sauce pan on the stove. Bring just to a boil, stirring frequently. Once it boils, remove from heat.

2. Place the salmon on a foil-lined baking sheet, and use a spoon or a basting brush to glaze the salmon. Use about 1/2 of the glaze, saving the rest.  Put it in the oven, and cook for 10 minutes.

3. Pull the salmon out of the oven, and brush/spoon most of the rest of the glaze on top. Put it back in the oven for 10 more minutes.

4. Check if the salmon is done – it should be nice and flaky. If it is, it’s ready to serve! If not, use any glaze that is left, and put it back in the oven for a few more minutes.

Makes 4 servings

Serve with Creamy Lemon Orzo with Butternut Squash and pan-roasted asparagus.

Creamy Lemon Orzo with Butternut Squash

1 c uncooked orzo
1/2 – 1 c butternut squash cut into small chunks
1 lemon
2 egg yolks
1-2 cloves garlic
1/2 c (1 stick) butter

1. Chop the squash into small chunks, and place in a small sauce pan with enough water to cover. Cook over medium heat until squash is tender, about 10 minutes.

2. Prepare orzo according to package directions. Drain and mix with cooked squash.

3. While those are cooking, prepare the sauce. Squeeze the juice from the lemon into a bowl (make sure to discard any seeds!). Crush in the garlic and whisk in the egg yolks.

4. Melt the butter, making sure it is quite hot. Slowly pour the butter into the lemon-egg mixture, whisking constantly. This will cook the egg but keep it from scrambling. Pour over the hot orzo and squash, mix to coat, and serve.
Makes 6 servings


Mexican Rice

I love Mexican food. It’s totally comfort food for me. Few foods make me happier than super cheesy enchiladas or some shredded beef tacos or tamales. Oh, tamales.

Maybe it’s because of growing up in Southern California, but I don’t think I’ve ever gone more than a week without eating Mexican food except for the few months I lived in Europe. And even then, when  my mom sent me a package she included some tortillas and enchilada sauce!

That being said, I’m no expert at making authentic Mexican food (though I would love to be!) But I have come up with a few good recipes over the years, and am constantly searching for and working on more.

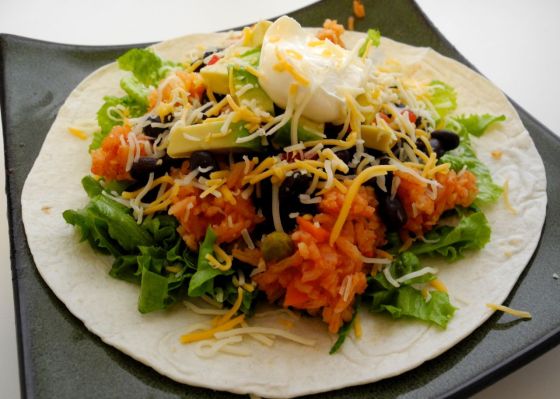
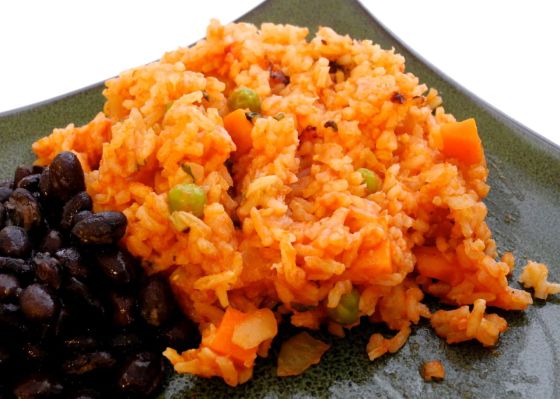
healthy taco salad with Mexican rice from scratch

This Mexican rice is pretty simple, and making it from scratch is a lot healthier than making packaged ones (they have soooo much sodium! and all sorts of preservatives and such). You basically just toss all the ingredients in a pot, put the lid on, and let it cook!

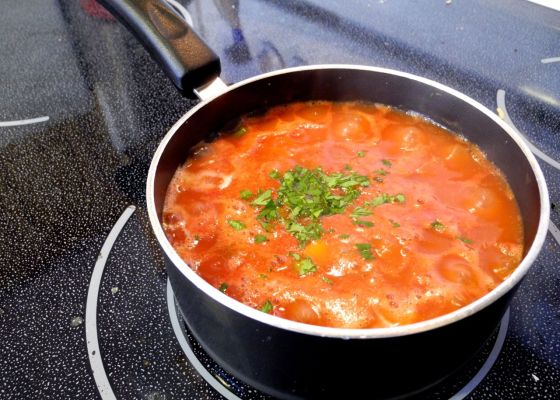
Mexican rice recipe

That’s fresh chopped cilantro on top of the bubbling rice. I love cooking with fresh herbs! Almost all of the ingredients for this recipe are fresh, and it makes the rice very flavorful.

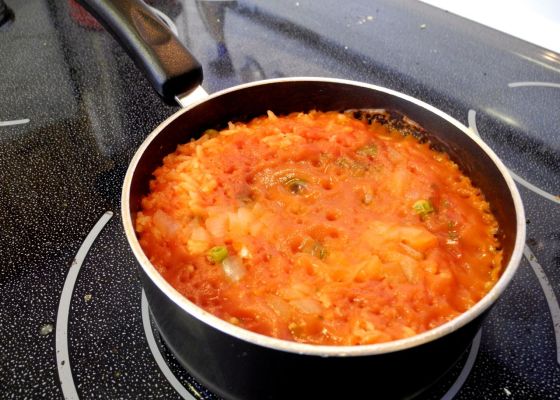
Mexican rice from scratch

When it looks about like this, it’s done. Stir it up with a wooden spoon – the tomato sauce tends to be thicker on the top. If there’s still liquid, just cover it back up and cook for a few more minutes.

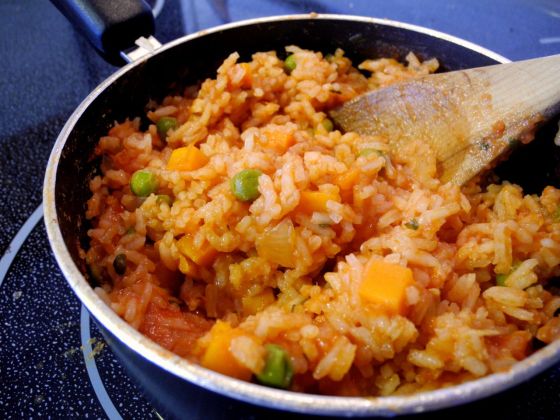
Mexican rice

It will be a little saucier than plain rice, but there shouldn’t be any standing liquid. It should look like this when it’s ready to serve.
Mexican Rice 

2 cups white rice
1 15 oz can tomato sauce
2 cups water
2 cloves garlic, minced or crushed
1 small onion, chopped
1/2 cup frozen peas and carrots
1 tsp cumin
1/2 tsp salt
1/2 tsp pepper
1 Tbsp chopped cilantro (optional)

Place all ingredients in a medium saucepan over medium-high heat on the stove. Once it reaches boiling, cover and reduce heat to simmer. Simmer about 20 minutes, or until liquid is absorbed and rice is tender. Stir and serve!
Makes 6-8 servings (about 4 cups cooked rice)

change it upSqueeze in some lime juice for a little more flavor, or if you like things a bit spicier, add 1/2 a chopped jalapeño or sprinkle in some cayenne pepper.

easy Mexican rice recipe

It’s great on taco salads, in burritos, or just as a side dish.

Mixed Roasted Potatoes

Yesterday I posted the recipe for the pork chops I served for Easter with these tasty (and colorful!) potatoes. So today I figured I should post the recipe for the potatoes.

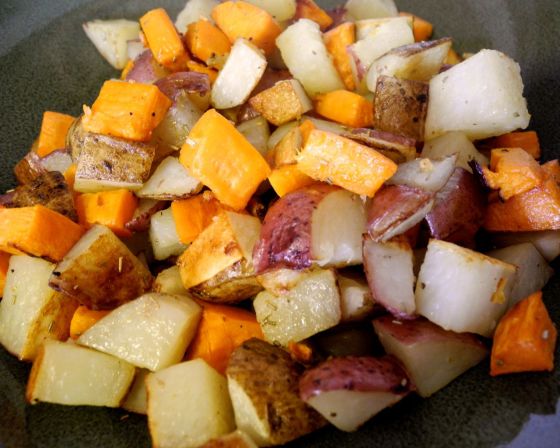
mixed roasted savory potatoes

I love the way these different potatoes look all mixed together. And I love even more the way they taste! The sweetness of the sweet potatoes is nicely balanced by the earthy flavor of the other two, and roasting them with herbs and spices just makes for a wonderfully savory side dish.

its good for youSweet potatoes have lots of fiber and are just packed with vitamins! And since the other potatoes still have their skins, they have lots of fiber and vitamins too! (B vitamins, vitamin C, and Iron to name a few)

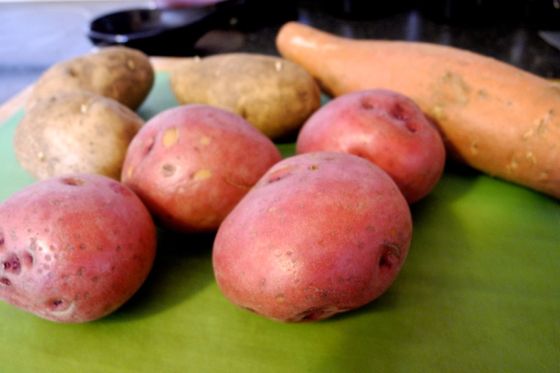
mixed roasted potatoes recipe

I used Russets, red potatoes, and sweet potatoes. Yellow, white, or purple would work as well – but Russets, sweet potatoes, and red potatoes are often the most easily available and least expensive. And you’ll definitely want some sweet potatoes in there for their flavor.
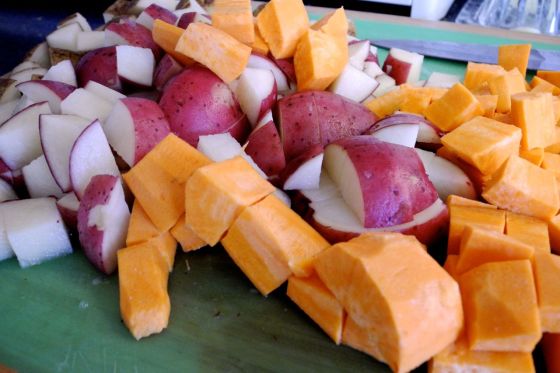
Scrub the potatoes and cut off any bad parts. Peel the sweet potato. Then chop them up into bite-size chunks. They don’t have to be perfect, just roughly similar sized pieces.

mixed roasted potatoes

Once they’re all chopped, toss them with a little olive oil, salt, pepper, and fresh rosemary (dried works too, it’s just not as strong of a flavor). Pour them onto a foil-lined baking sheet, and roast in the oven for about 20 minutes, mixing half way through so they get more evenly crispy. If you like them extra crispy on the outside, cook them a little longer.

I’m super bummed I didn’t get a picture of the potatoes with the pork chops! It all looked so scrumptious and colorful! Oh well… I’ll just have to make this meal again!

Mixed Roasted Potatoes

3 medium Russet potatoes
3 medium red potatoes
1 large sweet potato
1-2 Tbsp olive oil
1/2 tsp salt
1/2 tsp pepper
1-2 Tbsp chopped fresh rosemary (or 1-2 tsp dried)

1. Preheat oven to 425. Scrub the potatoes and cut off any bad parts. Peel the sweet potato. Chop the potatoes into bite-size cubes.

2. In a large bowl, toss the potatoes with the olive oil, salt, pepper, and rosemary. There should be just enough oil to lightly coat the potatoes and make the seasonings stick.

3. Pour the potatoes onto a foil-lined baking sheet and spread out in a single layer. Place on an upper-middle rack and cook for about 20 minutes, stirring the potatoes around half way through. For crispier potatoes, cook an extra five to ten minutes.

Serves 6-8

These would also be an excellent side with grilled chicken and some roasted or grilled veggies! Or even some grilled fish.

Savory Orange Pork Chops

I hope everyone had a beautiful Easter weekend! In spite of having a cold, we still had a lovely weekend spending time with family, watching my two-year-old run around looking for eggs, enjoying some spring sunshine, remembering our Savior, and eating some delicious food (and probably too much candy!).

I know entrees like a big spiral ham are more traditional Easter fare, but I don’t love ham (much to my husband’s disappointment) and there were only a few of us for Easter dinner, so we opted for something a little smaller: pork chops!

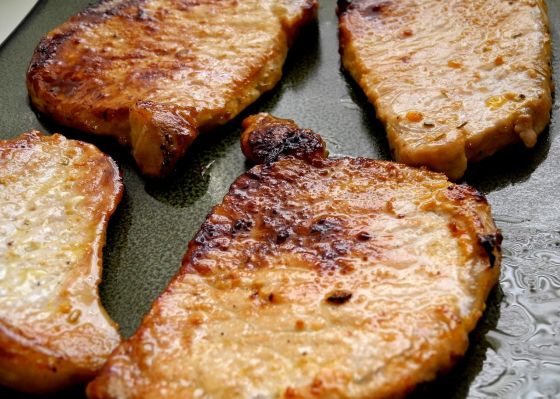
savory orange glazed pork chops

These pork chops have a lot of flavor, and the juice from the orange helps keep the meet tender and moist. But the best part? They’re super fast and easy to make!

I really like the thin-cut pork chops because they cook so quickly. And I also don’t particularly like eating thick chunks of meat. So I used the thin-cut chops, but thicker chops would work too. They would just take a bit longer to cook.

orange rosemary pork chops

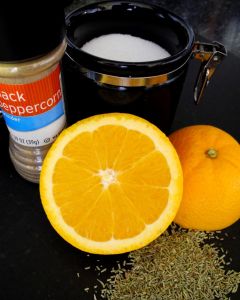
And that’s all you need for the marinade/glaze! An orange, rosemary, salt, and pepper. So simple! Fresh, fast, and delicious. Just put the pork chops in a dish (I used an 8×8 casserole pan – anything similar size would work), then squeeze the juice from the orange onto the chops. Sprinkle the salt, pepper, and rosemary on top, and let it sit for 15-30 minutes.

savory orange pork chops

When you’re ready to cook the meat, just heat the olive oil in a large pan, and toss in the meat (including any juice). Turn the chops over occasionally to make sure they cook evenly. They’re ready to serve when they’re just starting to turn golden.

We served them with mixed roasted savory potatoes, a salad, and (of course, it’s Easter!) deviled eggs. I’m really wishing I’d gotten a picture of the pork chops plated with the potatoes. They looked so lovely and delicious! Alas, I was too busy wanting to eat to remember to photograph!


Savory Orange Pork Chops

4 thin-cut pork chops
1 orange
1 tsp crushed rosemary (or 2 tsp fresh rosemary)
1/2 tsp salt
1/2 tsp pepper
olive oil

1. Place the pork chops in small dish (such as an 8×8 casserole pan). Squeeze the orange juice over the pork chops. Sprinkle the rosemary, salt, and pepper on top. Let sit for 15-30 minutes.

2. Heat a little olive oil (about 1 Tbsp) in a large frying pan on the stove. Place the pork chops in the pan, and pour any remaining juice in as well. Cook pork chops, turning occasionally, until they are beginning to brown.


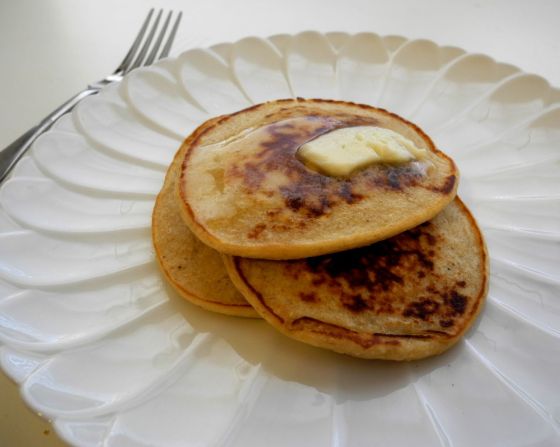
Oatmeal Cottage Cheese Banana Pancakes

If I had to pick between breakfast, lunch, and dinner food to eat for the rest of my life, I would absolutely and unquestionably choose breakfast. There are just so many delicious options! There’s just something about a lot of breakfast foods that feels like comfort food to me. So yes, I’m one of those people that frequently makes pancakes and eggs for dinner.

In keeping with my attempts to make meals that are actually full of good foods and not processed junk, I’ve been experimenting with several different pancake recipes lately. This one came from a recipe my sister introduced me to, but I added a few more ingredients and changed things up a bit. And the end result is a rather delicious incredibly moist pancake!

cottage cheese oatmeal banana pancakes

Honestly, these pancakes are so moist and flavorful, that I don’t even use syrup on them. I just butter them and dig in! I’m sure they’d be delicious smothered in maple syrup (or fruit syrup!), but they don’t need it. They’d also be tasty with a pile of fresh fruit on top!

Because they have cottage cheese in them, which melts when they cook, they stay pretty moist in the middle. My husband doesn’t like this – he says they’re gooey. I love it! A lot of pancakes are too dry for my taste, and you have to bathe them in syrup for them to be edible. Don’t get me wrong, syrup is delicious, but probably not the healthiest thing for you. So the fact that these are moist and sweet all on their own is a major win for me!

Oh, and they kind of taste like banana bread. Which I love.

its good for you Oats have soooo many health benefits – starting with lots of fiber! The cottage cheese and eggs give you a nice amount of protein (so important for starting your day!) And there’s no added sugar!!

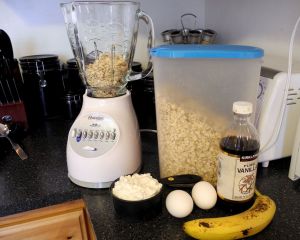
These pancakes are also quick and easy to mix up. Just throw all the ingredients in the blender!

oatmeal cottage cheese banana pancakes

oat cottage cheese banana pancakes

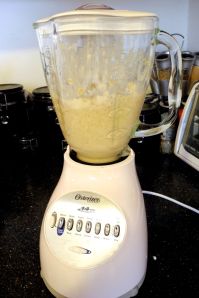
You may need to stop and scrape down the sides to make sure everything gets blended evenly.

cottage cheese oat banana pancakes

Then cook them on the stove or a griddle.

all natural oat pancakes

Serve hot with some butter and enjoy!

Oatmeal Cottage Cheese Banana Pancakes

2 cups oats
1 cup cottage cheese
2 eggs
1 banana
1 tsp vanilla
pinch of salt
milk (if needed to thin batter)

1. Place all ingredients (except milk) in the blender and blend until smooth, scraping down sides as needed. If the batter seems to thick, add a little milk and blend again.

2. Pour batter onto heated griddle or frying pan. I do about 1/4 cup per pancake, but you can make them as big or small as you like.

3. When the bottom is cooked and begins to brown, flip the pancakes over and continue cooking until that side is cooked and golden. The insides will stay a little moist from the cottage cheese melting.

Makes about a dozen pancakes.

banana oat cottage cheese pancakes

change it upAfter blending, mix in some fresh fruit such as blueberries, chopped strawberries, raspberries, etc.