chicken pad thai salad

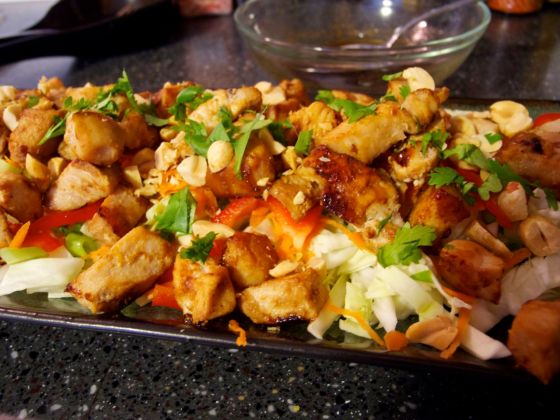
I love summer, but I hate cooking in the summer! It’s just too hot to have the oven or stove on for very long, and some days are definitely too hot to eat a hot meal. That’s one of the reasons I love this lighter, fresher, veggie-packed version of the classic Thai dish.

chicken pad thai salad

time saverAnother nice thing about this recipe is that it can all be prepped ahead of time, which makes it great for taking to a summer picnic or barbecue, or just for those days that you won’t have time to cook for dinner. Just don’t pour on the dressing until you’re ready to eat it, and the salad should stay nice and crisp for up to about 24 hours.  You can also marinate the chicken for up to about 24 hours, so you can get it ready when you have time and then just leave it until it’s almost time to eat!

its good for youBy replacing the noodles with cabbage and carrots, you’re eliminating processed carbs and trading them for fresh vegetables packed with nutrients and vitamins! And cabbage is one of many vegetables that may help with lowering cholesterol and preventing some types of cancer!

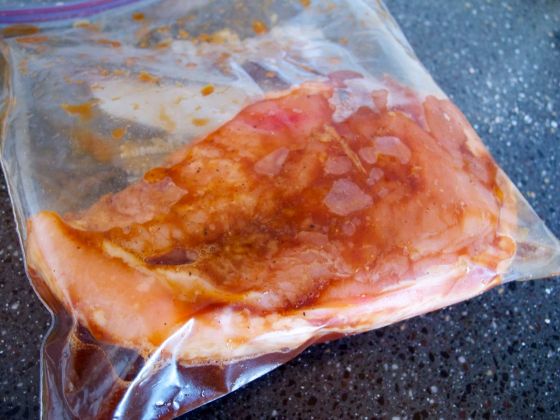
For the chicken, put the raw chicken in a gallon-size bag, pour in the soy sauce, squeeze in the lime juice, crush in the garlic, and toss in some salt and pepper. Then just squish everything around for a minute until it seems mixed and the chicken coated, and stick it in the fridge until you’re ready to cook the chicken.

chicken pad thai salad recipe

(Mmm… delicious! Is there any way to make raw chicken not look disgusting? If so, I certainly haven’t figured it out. But trust me, once it’s cooked it will taste great!)

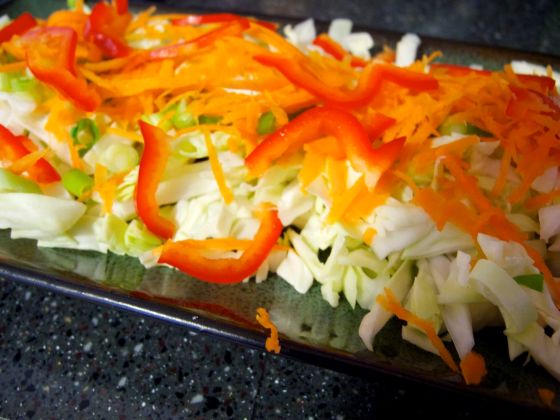
Now you just need to chop up the cabbage, peppers, green onions, peanuts, and cilantro, and shred the carrots.

pad thai salad recipe

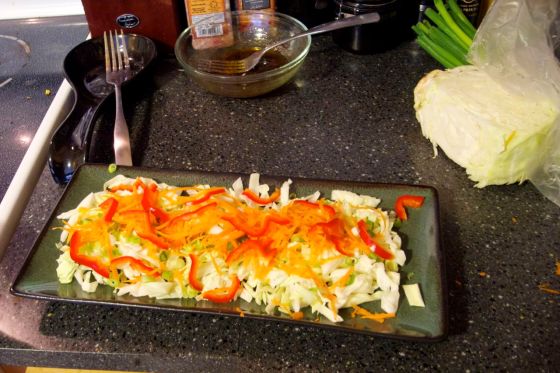
I layered the salad (I thought it looked pretty) but you can just toss it in a bowl if that’s easier. You can chop the veggies while the chicken’s marinating, or wait until it’s cooking.

pad thai salad

You can also mix up the salad dressing while you wait for the chicken. Just mix the soy sauce, oil, vinegar, lime juice, brown sugar, and cayenne in a bowl. You’ll want to mix it up again (I’ve found forks work best) just before serving – the oil tends to separate.

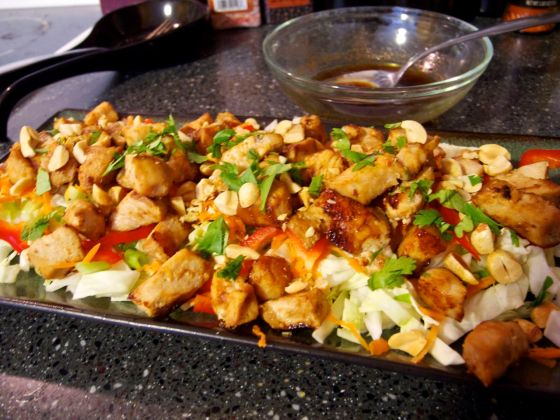
When you’re ready to cook the chicken, you can either chop it up and cook it in a frying pan on the stove, or grill it and chop it up after it’s cooked. Then add it to the salad, top with the dressing, and enjoy!

pad thai chicken salad

Chicken Pad Thai Salad

For the chicken:

1 lb raw chicken
1/4 cup soy sauce
1 lime
1-2 cloves garlic
pinch salt and pepper

For the salad:

1 head green cabbage
2 carrots
2 green onions
1/2 red bell pepper
1/2 cup peanuts
1/2 cup bean sprouts (optional)
1/4 cup cilantro

For the dressing:

1 Tbsp olive oil
1 Tbsp vinegar
1 Tbsp soy sauce
1 lime
1 tsp brown sugar
pinch cayenne pepper

1. Put all the ingredients for the chicken in a gallon-size plastic bag and seal. Squish it around to make sure the ingredients in the marinade are mixed, and place in the refrigerator for at least half an hour and up to 24 hours.

2. Chop up all the vegetables (I shredded the carrots) for the salad, and layer on a platter or mix in a large salad bowl.

3. Mix all the ingredients for the salad dressing in a small bowl. Be sure to mix again before pouring on the salad, as the oil tends to separate.

4. Cook the chicken either on the stove or on the grill. If on the stove, I recommend chopping it up first. Allow to cool a bit, then add to salad. Pour dressing on top and serve.
Moroccan couscous and roasted vegetables

I have a slight obsession with Mediterranean food. One of my dream vacations is to go on a Mediterranean cruise because I would love to see all the art and architecture and such, and I want to try all the amazing food! So many beautiful combinations of herbs and spices. I just love it.

A while ago I found a recipe for Moroccan chicken from the Betty Crocker cookbook, and it was amazing. We make it all the time. So I decided to take the basic ideas from that recipe, and adapt it to make Moroccan spiced couscous, and some roasted veggies to go with it.

moroccan couscous and roasted vegetables

its good for youUse whole wheat couscous for a healthier, higher-fiber meal. And all the vegetables are of course so healthy! There’s very little salt since there are so many wonderful spices, and the only fat is from the olive oil, which is also good for you. And of course, it’s delicious!

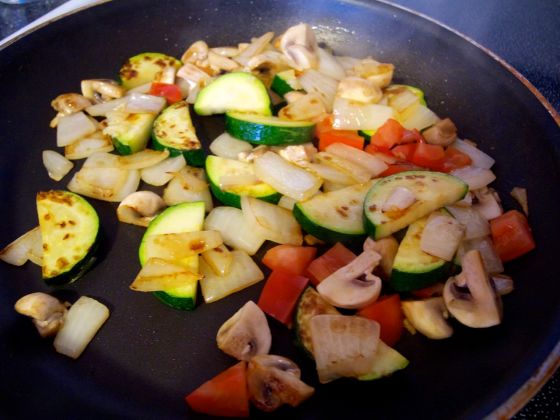
Put a medium pot on the stove with the water and olive oil, and bring to a boil. In the meantime, chop up all the vegetables, and toss them in a frying pan with olive oil, and a little salt and pepper if desired. Toss regularly, and cook until the onions are tender and the vegetables are getting nicely browned/roasted.

pan roasted vegetables

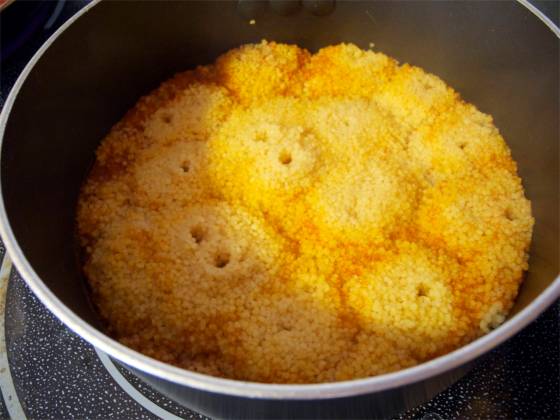
Once the water boils, add the spices and couscous, remove from heat and cover with a lid. Let it sit for about five minutes, then fluff the couscous with a fork.

moroccan couscous

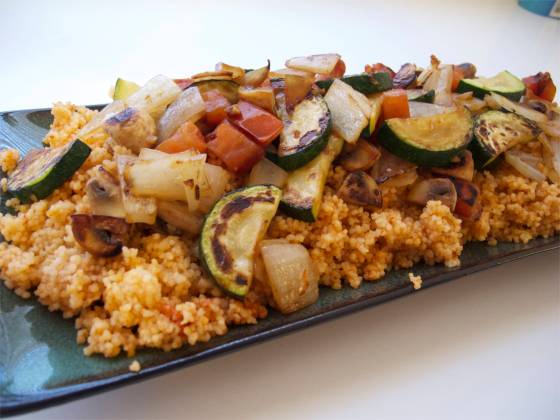
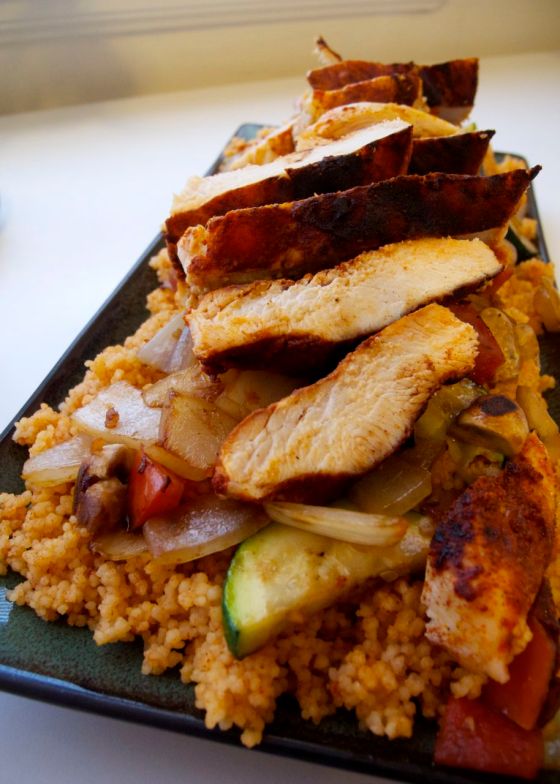
Serve the roasted veggies with the couscous, along with Moroccan grilled chicken and sliced papaya, if desired. I know, it sounds a little weird to serve papaya with this, but trust me. It’s amazing. The flavors complement each other wonderfully.

moroccan chicken couscous and roasted veggies

Moroccan Couscous and Roasted Veggies

1 Tbsp paprika
1 tsp cumin
1/2 tsp cinnamon
1/4 tsp allspice
pinch of salt
1 Tbsp olive oil
2 cups water
1 cup couscous
1/2 medium onion
1 medium zucchini
8 mushrooms
1/2 red bell pepper
1 small tomato
1-2 Tbsp olive oil

1. Mix all the spices together in a small bowl. In a medium pot, bring the water and olive oil to a boil. Once it comes to a boil, remove from heat, add spice mix and couscous, and cover with a lid for about five minutes.

2. Chop all the vegetables, and toss in a large frying pan with the olive oil. Cook, tossing regularly, until onions are tender and vegetables look nicely roasted.

3. Fluff the couscous with a fork, and serve with the vegetables. Serve with Moroccan grilled chicken and sliced papaya if desired.

For the Moroccan grilled chicken, use the spice mix from above, rub onto a chicken breast, and cook on a grill or frying pan. Slice and serve with the couscous and vegetables.

change it upYou could also add eggplant or artichoke hearts if desired

super simple chocolate sauce

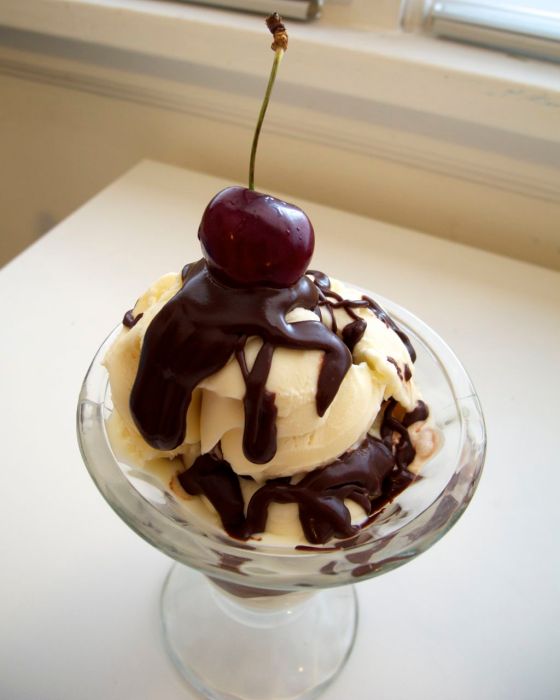
My name is Megan, and I have a problem. I’m a little addicted to chocolate. It’s just so good! And so good with other things! And that’s why I made this chocolate sauce.

super simple chocolate sauce

It’s so quick and easy to make, and can be used for so many things! My favorite is on ice cream, but it’s also great on fruit, or used as a glaze for cakes or donuts, or to just eat by the spoonful. I mean…

simple chocolate sauce recipe

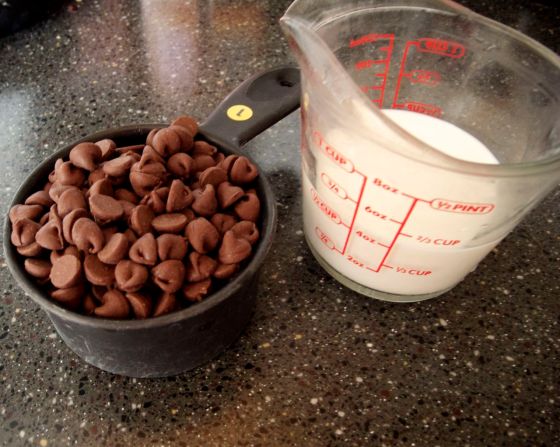
And all you need to make it is chocolate chips and half-and-half! And you can make as much or as little as you want – it’s just two parts chocolate chips, one part half-and-half. I usually do 1 cup chocolate chips, and 1/2 cup half-and-half. That makes enough for about 10 ice cream sundaes. And since it reheats well, if you have extra just keep it in the fridge and reheat it in the microwave.
In a small saucepan, heat the chocolate chips and half-and-half over medium heat, stirring constantly, until the chocolate melts and the sauce is smooth. It takes about five minutes. Pour over ice cream, fruit, etc.

super simple chocolate sauce recipe

It will set up a little bit, kind of like ganache, as it cools, but it won’t get hard.

Note: I used dark chocolate chips because I thought that would taste good with the amazing cherries we bought at the farmer’s market (it did!) But you could use dark, milk, or semi-sweet, depending on the taste you want.

Super Simple Chocolate Sauce

1 cup chocolate chips
1/2 cup half-and-half

Combine chocolate and half-and-half in a small saucepan over medium heat. Stir constantly until the chocolate melts and the sauce is smooth. Serve over ice cream, fruit, as a glaze, etc.

best bean dip

I spent last week playing at the beach with my family, so I was far too lazy busy for blogging. It was glorious. And I want to go back. But alas, it’s back to real life. At least I have this super-easy-incredibly-tasty recipe to share with you today!
I made this bean dip for my little boy’s birthday party a few weeks ago, and it was a huge hit! We had leftovers of all the other food, but the bean dip was all gone by the end of the party! Everyone kept coming back for more. And the best part? It’s only four ingredients!
easy bean dip

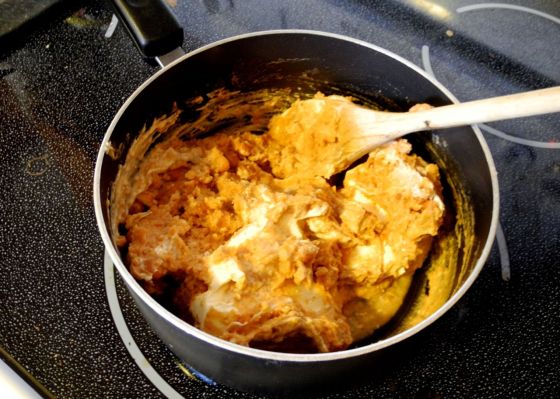
Just get a medium sauce pan and dump in one can of refried beans and one package of cream cheese.

bean dip recipe

Stir over medium heat until the cream cheese melts and the beans and cream cheese are combined. (I know it, doesn’t look very appetizing. But let’s be honest, refried beans kinda just look like mush. Also, I was hastily preparing things for the birthday party and didn’t have time to get pretty pictures.)

best bean dip recipe

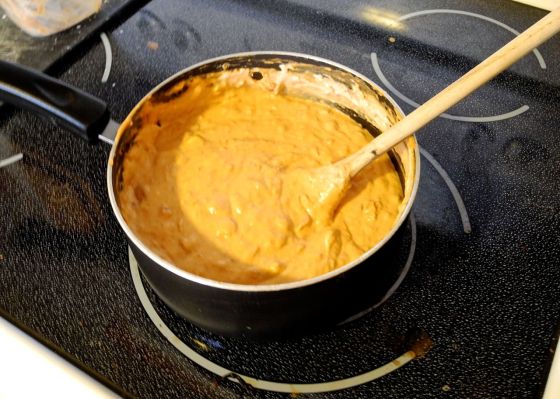
Now stir in the salsa and shredded cheese, and stir until everything’s combined, hot, and melty. (yes, that’s the technical term.)

four ingredient bean dip

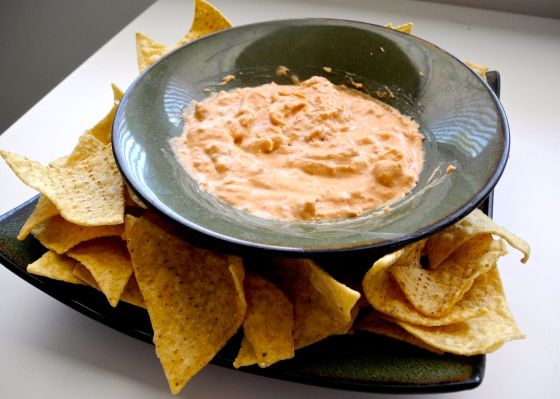
Pour into a bowl or other serving dish, and serve warm with tortilla chips! Get some fast – it’ll disappear pretty quickly! And if you’re making this for a crowd, the recipe is super easy to double, triple, etc.

Best Bean Dip

1 15 oz can refried beans
1 8 oz package cream cheese
1/2 cup salsa
1/2 cup + shredded Mexican blend or cheddar cheese

1. In a medium sauce pan, combine beans and cream cheese. Cook over medium heat, stirring frequently, until the cream cheese melts and the beans and cheese are combined and smooth.

2. Add the salsa and shredded cheese, and stir until cheese is melted and everything is heated through. Serve with tortilla chips.

Goat Cheese and Sausage Quiche

My husband and I celebrated our fifth anniversary this month! So we celebrated by dropping the kids off with the grandparents, going out for Ethiopian food (amazing. seriously.) and then going to Trader Joe’s. We’re so romantic. (and we did drive to a few beautiful lookouts in the city before we got pelted by a crazy rainstorm.) But  really, we love that store!  He bought me a beautiful orchid plant (one of my favorite flowers!!) and then we wandered around the store tossing whatever delicious things we felt like getting into our basket. One of those things was goat cheese. I don’t often buy it because it’s fairly expensive, but hey, it was a special occasion! 🙂

So then I had this delicious goat cheese, and had to come up with something to do with it. Then I remembered this Italian sausage I’d stuck in the freezer, plus some fresh spinach we had in the fridge… and one thing led to another, and we had a quiche!

goat cheese sausage spinach quiche

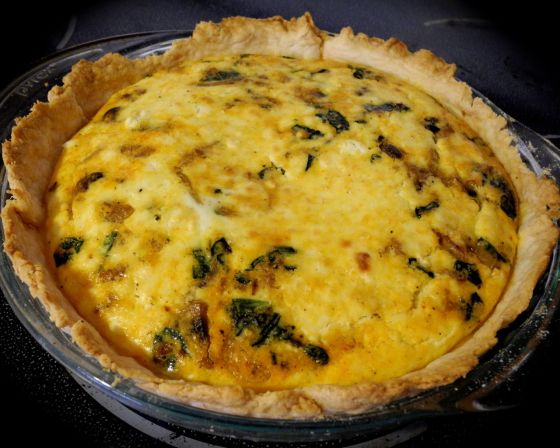
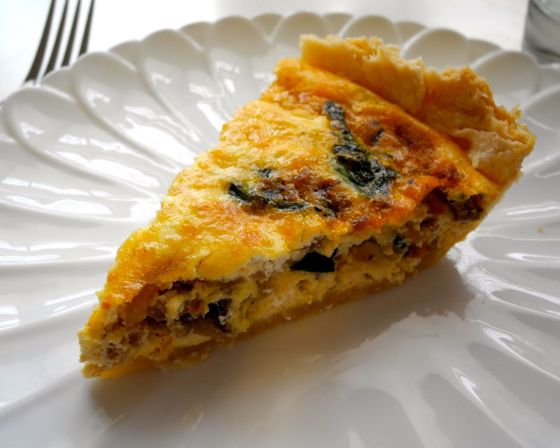
The beautiful and delicious end result! This golden, fluffy, flavor-packed quiche.

This meal took a bit longer to prepare than most of my meals because I made the pie crust, cooked the sausage, sautéd the veggies, made the filling, and then the whole thing had to bake. The prep time was probably about 30 minutes, then the bake time was about 45. So plan ahead a little bit for this meal! It would be great for a brunch, or even for dinner. But if you’re like me and don’t like to get up early, you probably won’t be eating this for breakfast (unless it’s as leftovers).

Start off by making the pie crust. For my tips and recipe, check out this post. Or if you really want (but I’m telling you, it won’t taste as good!) you can use a frozen or refrigerated crust.

Then cook the sausage in a medium frying pan. I used an Italian sausage, the bulk kind (like ground beef) not links. It adds a nice flavor and texture to the quiche, and complements the goat cheese well.

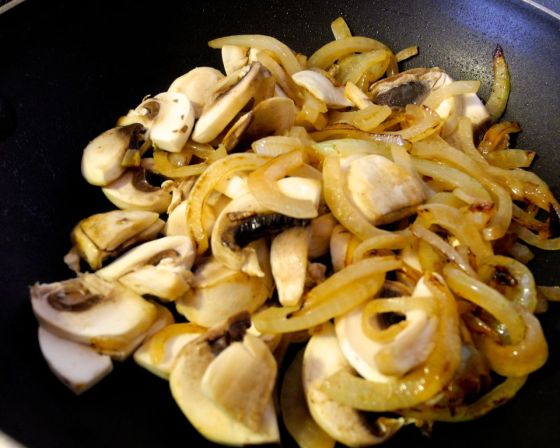
While the sausage is cooking, slice the onion into thin slices, and toss in a small frying pan with the butter to caramelize. While the sausage and onion are cooking, slice the mushrooms and chop up the spinach.

caramelized onions and mushrooms

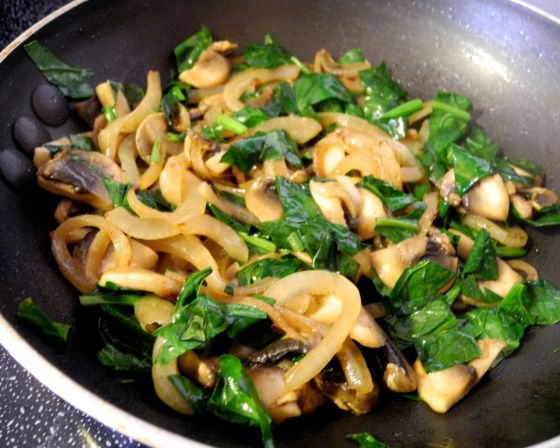
Once the onions are turning golden, add the mushrooms, stirring often. When the mushrooms are tender and beginning to brown, add the spinach.

caramelized onions mushrooms and spinach

Cook, stirring often, until the spinach is wilted. Mix the vegies with the cooked sausage, and set aside.

Prepare the egg filling by whisking the eggs, milk, salt, pepper, and paprika together in a medium bowl until frothy.

goat cheese sausage spinach quich recipe

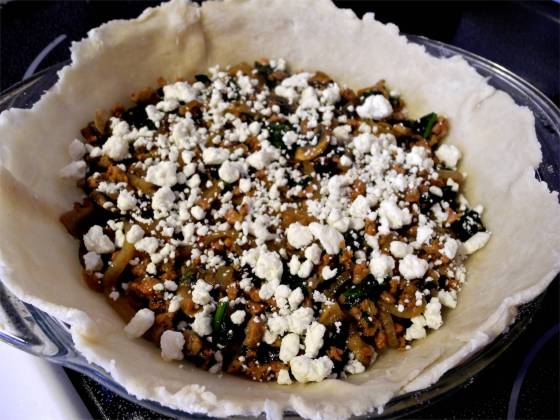
Pour the sausage and vegetables into the pie crust, and sprinkle the goat cheese on top.

quiche recipe with goat cheese sausage spinach mushrooms

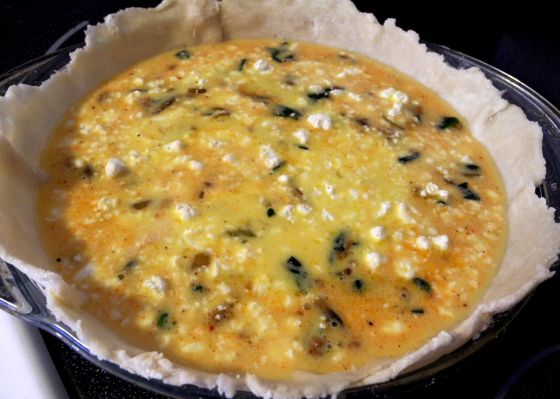
Slowly pour the egg mixture into the pie crust. (Or you can just mix everything in with the eggs, and pour it all together into the pie crust.)

Bake at 375 for about 45 minutes, or until the quiche is set (if you’re not sure, stick a butter knife in the center. It should come out clean). Remove quiche from the oven and let it sit for a few minutes before cutting and serving. If you’re worried about the edges of the crust burning, you can cover them with foil for the first 25 minutes of baking.

goat cheese spinach sausage quiche

Goat Cheese and Sausage Quiche

1 9-inch pie crust
1/2 lb bulk Italian sausage
1/2 large onion
4-6 mushrooms
1 1/2 cups chopped fresh spinach
4 oz crumbled goat cheese
5 eggs
1 cup milk
1/2 tsp paprika
pinch of salt and pepper

1. Preheat oven to 375. Prepare the pie crust, if making homemade. In a medium frying pan, cook the sausage until browned. While it’s cooking, slice the onions and mushrooms, and chop the spinach.

2. Heat a small frying pan with a little bit of butter. Add the sliced onion, and let cook, stirring occasionally, until golden. Add the mushrooms, and continue cooking until the mushrooms are beginning to brown. Add the spinach, and cook until the spinach is wilted. Mix with the sausage and set aside.

3. In a medium bowl, whisk the eggs, milk, paprika, salt, and pepper until frothy.

4. Pour the sausage and veggie mixture into the prepared pie crust. Sprinkle in the goat cheese. Pour in the egg mixture. Bake in the oven for 40-45 minutes, or until quiche is set. Remove from oven and let stand a few minutes before serving.

Makes on 9-inch quiche, approximately 8 servings.


change it upYou could also add (or substitute for some of the other vegetables) red peppers, sun dried tomatoes, and/or roasted garlic.

How to make a pie crust

I love making pies. I’ve talked about this before, but seriously, it’s almost therapeutic for me. There’s just something so satisfying to me about making the whole thing from scratch – crust, filling, everything. And it just tastes soooo much better than those horrible frozen pies, or the ones in the grocery store bakery that have probably been sitting there for a week and don’t seem to actually contain real fruit.

And maybe it’s just because I like to make them, or maybe I’m just a snob, but there really is a huge difference between a pie with a homemade crust and a store-bought crust. I know, it’s just the thing that holds the filling together. No one eats pie for the crust. But still, if you start with a good crust, the whole pie is better. Trust me.

My mom is a wonderful cook, but she just refuses to make her own pie crusts. She’s convinced it’s too much work, too hard, and never turns out right. But I promise, they’re really not that hard! So I’m going to share a few tips, tricks, and my go-to recipe so that you can make your own pie crusts and dazzle everyone with your amazing pie-making skills.

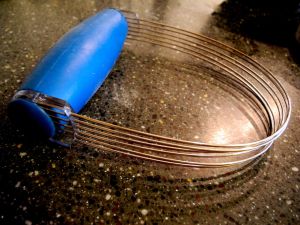
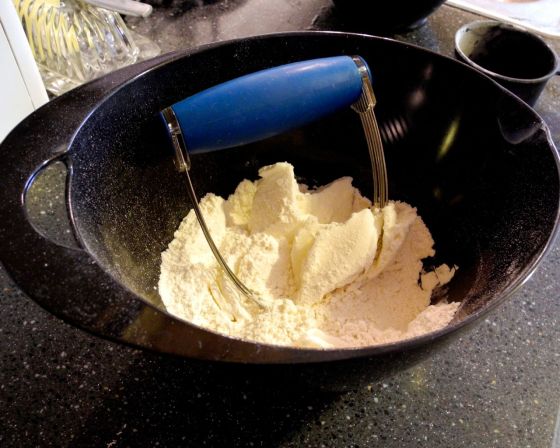
how to make a pie crust 1 First, let me introduce you to my friend the pastry blender. This simple little kitchen gadget makes all the difference in making perfect pie crusts. They’re pretty cheap, and you can find them anywhere they sell kitchen tools. But this thing does most of the work for you.

Put your flour and salt in a large bowl, and mix together. Then add the shortening, and use the pastry blender to mix. Use a scooping motion to cut the shortening into the flour. You’ll probably need to occasionally scrape some of the shortening off the sides of the pastry blender.

how to make a pie crust 2

See in the picture above, there are still large chunks of shortening, but it’s starting to get this crumbly texture. Keep using the pastry blender, in that same sort of scooping motion, to break up the shortening and blend it in to the flour.

how to make a pie crust 3

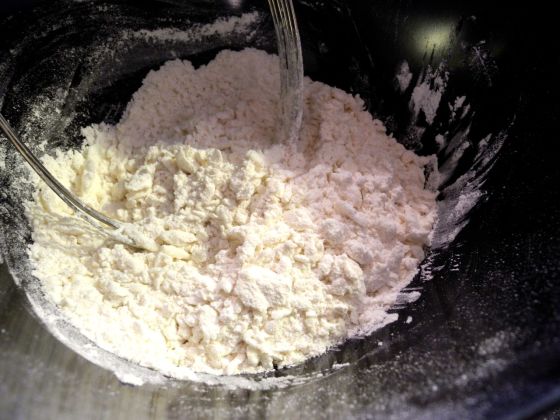
This is about the texture you want it to be – nice and crumbly looking, almost like lots of little pea-sized lumps. Now you’re ready to add the water. Use cold water! This keeps the shortening from melting. I know some people even use ice water, but as long as it’s cold, it’s worked for me.

Start adding the water one tablespoon at a time. You can keep using the pastry blender at first, but I usually end up using my hands once it starts getting soft and sticky.

how to make a pie crust 4

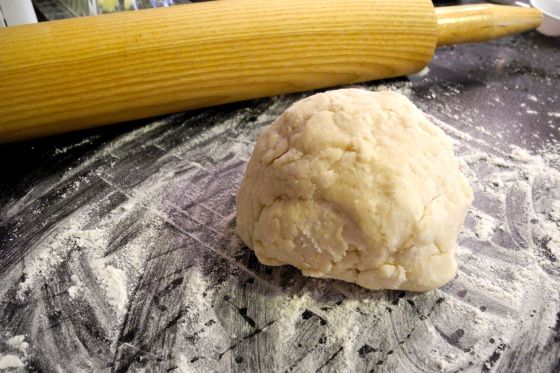
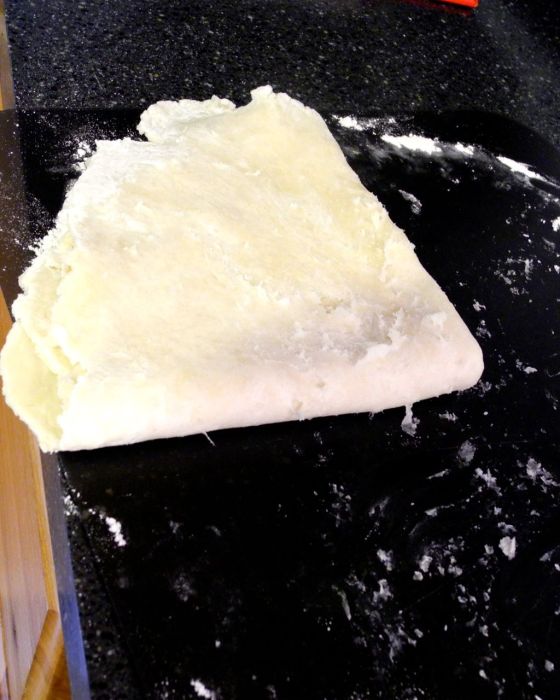
Your dough should look about like this – a little bit sticky, but still kind of flaky. If it won’t stick together, add a little more water. If it’s really sticky and wet, add a little more flour. Don’t over-mix or knead it, just mix till it will stick together and form a ball. You want a nice marbled look (you can see it better in the picture below). Form a ball, and turn it out onto a floured surface to roll it out. Press the ball flat with the palm of your hand. You can refrigerate the dough for about half an hour now, wrapped in plastic wrap, before rolling it out – some say it’s easier to roll and makes the crust more flaky. I usually don’t (because I don’t plan ahead and have enough time…) and mine still turn out fine.

how to make a pie crust 5

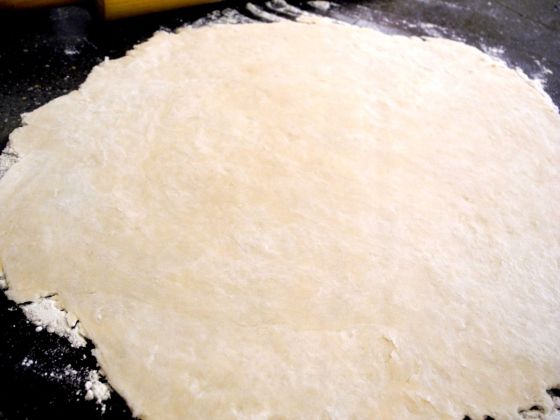
Roll it out until it’s nice and thin. If it starts to tear, wet your fingers and patch it back together. If the dough sticks to the rolling pin too much, rub a little more flour onto the rolling pin. When rolling the dough, use firm and even pressure on the rolling pin to push the dough out and away rather than down. Change directions often to create a circle. (Don’t worry if it’s not perfectly round. Mine never are. You’ll trim the edges later anyway. You just want to make sure it’s roundish so it will fit in your pie pan.)

You can see that nice marbled look in the picture above – it’s the shortening not completely blended in with the flour. This is what makes the pie crust flaky! That’s why you don’t want to over-mix it.

Once you think it’s thin and big enough, turn your pie plate upside down over the crust to measure; it should come out at least one to two inches all the way around the edge of the pie pan. If it’s big enough, you’re ready to move it to the pie pan!

how to make a pie crust 6

The best way I’ve found to do this is slowly and gently lift one side and fold the crust in half. Then, still slowly and gently, lift one side to fold it in fourths. Now pick up the wedge of crust, move it to the pie pan, and unfold it. If there are any tears, wet your fingers and press the crust back together.

Now trim any extra around the edges (you can leave a little extra either to make a decorative edge, or to seal the top crust on) and fill your pie! Or if you’re making a cream pie or other pie that doesn’t need to bake, poke a few holes with a fork in the bottom and side, and bake the crust. (The holes keep it from puffing up or forming bubbles in spots.)

And here’s my favorite recipe! Makes one 9-inch crust

Basic Pie Crust

1 cup flour
pinch of salt
1/3 cup shortening
3-4 Tbsp cold water

Mix flour and salt in a medium or large bowl. Add the shortening, and use a pastry blender to cut it in to the flour (see tips above).

Once it has a nice crumbly texture, about the size of small peas, begin to add the water one tablespoon at a time. Continue adding water until the dough becomes sticky enough to form a ball. If it gets too sticky, add a little more flour.

Roll it into a ball, then put it on a floured surface and press it flat. You can wrap it in plastic wrap and refrigerate for about half an hour if desired (some say it makes it easier to roll out, and flakier). Use a floured rolling pin to roll out the dough. It should be about two inches larger than the pie pan. Slowly and gently fold the dough in fourths, transfer to the pie plate, and unfold. Mend any tears with wet fingers gently pressing the dough back together. Trim the edges, and you’re ready to fill the crust! Then just bake according to the directions for that pie.

If you’re making a pie that needs a pre-baked shell, use a fork to poke a few holes in the bottoms and sides, then bake it at 475 for about 15 minutes (check after 10). Let it cool, then fill.

Sorry if I disappointed anyone by not having cute ideas for the pie crust edges. I usually just use a fork to create a ridged look, or put a crust on top – which I’ve usually cut a heart or other shape in the center of. Maybe some day I’ll get more creative and share some decorative ideas! In the meantime, go make a pie and see how simple and delicious it is to have a homemade crust!

Crispy Cajun Chicken with Creamy Avocado Pasta

Apparently I’ve gotten really lazy about posting new recipes lately… I’ll blame it on the fact that I’ve had allergies or a cold for about a month now. But really, I’m probably just lazy. I have several new recipes that I’ve even taken pictures of, I just haven’t gotten around to sorting/editing the pictures and writing up a blog post. Maybe I’ll get a burst of motivation and have lots of new posts soon! Or more likely they’ll trickle in eventually…

But here’s a recipe for the delicious Cajun-inspired meal I made last night. It was so simple, and so delicious, I had to share it!

Cajun chicken pasta with creamy avocado sauce

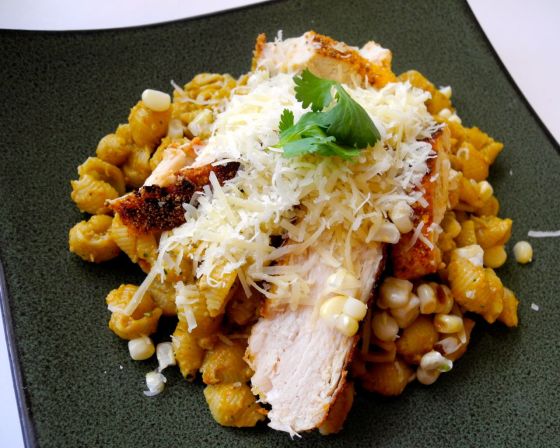
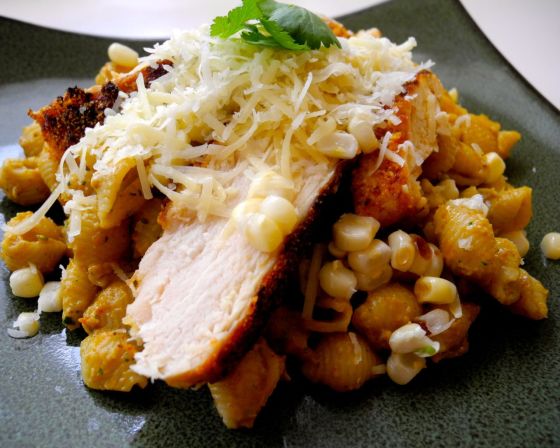
Crispy Cajun chicken, pasta with a creamy avocado sauce, grilled corn, and all topped with sharp white cheddar.

To get started, put a pot of water on the stove to boil for the pasta. Then flatten out the chicken breast with a meat mallet.

time saverI love meat mallets! Seriously, one of my favorite kitchen gadgets! Cooking a whole chicken breast on the stove or grill can take a long time, especially the huge, thick ones you always seem to get these days. And cutting raw chicken is 1) gross and 2) time consuming. But flatten it out a bit with a meat mallet, and it cooks so much faster! Then if you need it in smaller pieces, slice it up after it’s cooked.

crispy Cajun chicken recipe

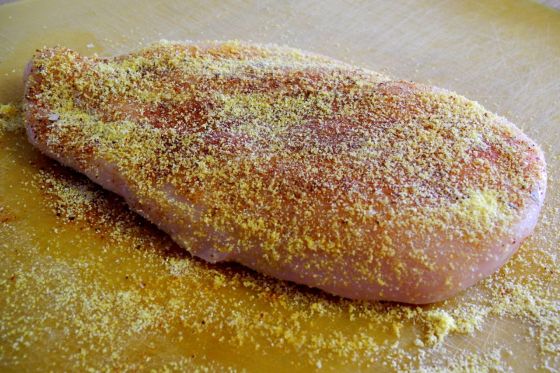
Then rub the Cajun seasoning and corn meal into the chicken, and toss it in a pan with a little olive oil.

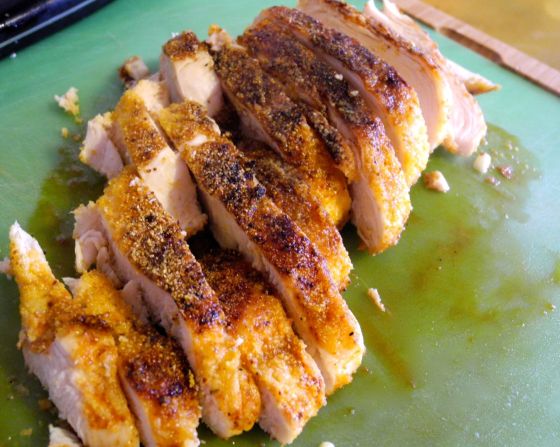
crispy Cajun chicken

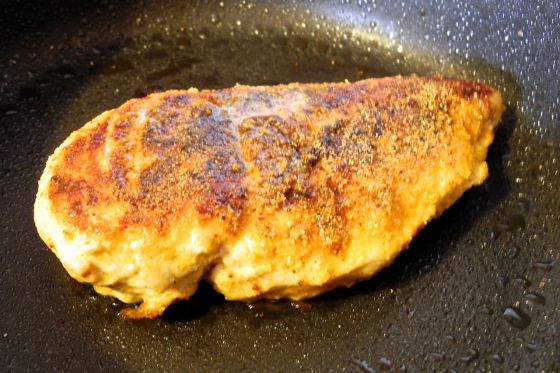
Once the bottom side is nice and crispy and browned, turn it over and keep cooking until golden, or even slightly blackened. The corn meal gives it a nice crispy texture on the outside.

While the chicken is cooking, get the pasta cooking, grill or pan-roast the corn, and make the sauce. To make the sauce, put the avocado, tomato, lime juice, garlic, cilantro, and Cajun seasoning in the blender, and puree until smooth. (I love using avocados to make “cream” sauce – they’re so creamy, but with that delicious avocado flavor!)

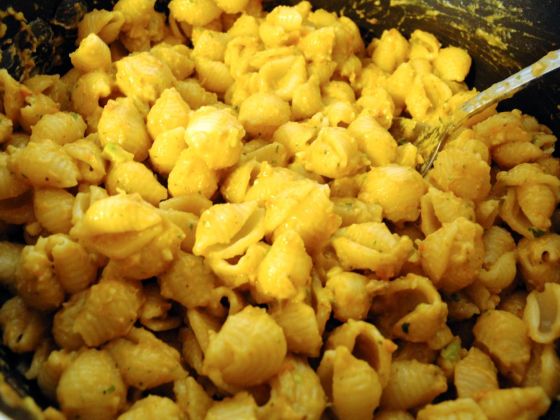
creamy avocado Cajun pasta

When the pasta is done cooking, drain it and return it to the pan. Stir in the sauce, and heat through. It doesn’t need to really cook, just heat.

crispy Cajun chicken pasta

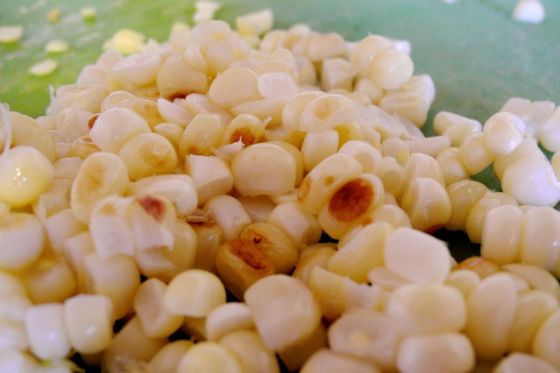
Slice the chicken, cut the kernels from the corn, and shred the cheese.

grilled corn

Serve the pasta onto plates, and top with chicken, corn, cheese, and a few extra sprigs of cilantro. Enjoy!

crispy Cajun chicken with creamy avocado pasta

I also make my own Cajun seasoning because the packaged stuff is soooo full of salt and other random preservatives, which is silly because it’s just spices and spices don’t have them. Anyway, you can just use a store-bought Cajun seasoning, or make your own. This will make more than you need for this recipe, but you can save it for other recipes, like Cajun fries!

Cajun Seasoning

1 Tbsp chili powder
1 Tbsp paprika
1/2 tsp onion powder
1/2 tsp garlic powder
1/2 tsp salt
1/2 tsp oregano
1/4 tsp bay leaves
1/4 tsp cayenne pepper
1/4 tsp pepper

And now for the main event:

Crispy Cajun Chicken with Creamy Avocado Pasta and Roasted Corn

1 large chicken breast
1 tsp Cajun seasoning
1 Tbsp corn meal
1 Tbsp olive oil
1 cup dry pasta, such as bow ties or shells
1 large avocado
1 small tomato
1 lime
1/2 cup fresh cilantro
1 clove garlic
1 tsp Cajun seasoning
1 ear corn
1/2 cup shredded sharp white cheddar

1. Put a pot of water on the stove to boil for the pasta. Heat the olive oil in a frying pan. Flatten the chicken with a meat mallet, and rub with the Cajun seasoning and corn meal, and add to the frying pan. Cook until golden brown on the bottom, then turn and continue cooking.

2. When the water come to a boil, add the pasta and cook according to package directions.

3. While the chicken and pasta cook, grill the corn. (I used a George Forman grill, but you can just put it in a frying pan and turn it occasionally.)

4. Make the sauce by putting the avocado, tomato, cilantro, lime juice, Cajun seasoning, and garlic in the blender. Puree until smooth.

5. When the pasta is done, drain and return to pan. Stir in the sauce and heat through. Slice the chicken and cut the kernels from the corn.

6. Serve the pasta onto plates and top with chicken, corn, and shredded cheese.

Makes about 4 servings.

One note – because the sauce is avocado-based, it doesn’t reheat very well. It can be saved and reheated, but it’s much better eaten fresh!

Apple Pie Bran Muffins

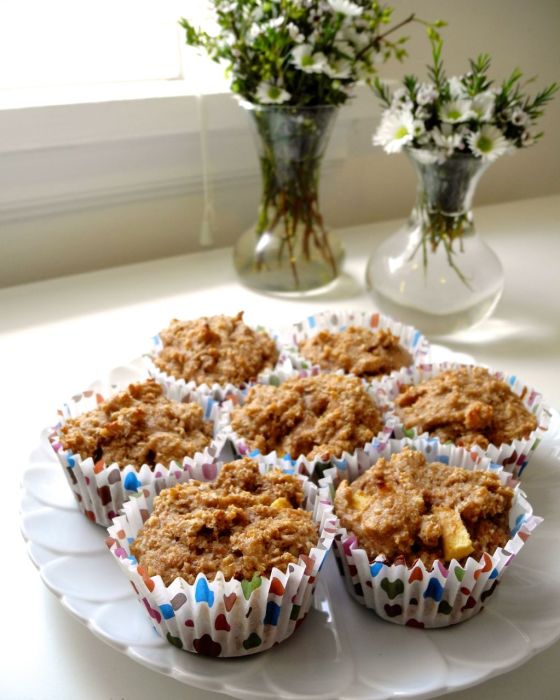
A few months ago, we decided to stop eating (and buying) cereal. I’m working on a post with lots of healthier alternatives (that are still fast!) but for now, I’ll give you another muffin recipe. A lot of muffins are basically just cake that we’ve convinced ourselves is ok to eat for breakfast. Not these babies!

apple pie bran muffins

its good for youThese are full of whole-grain goodness, protein, and no sugar or oil! (Well, no processed sugar – there is natural sugar in the apples and honey) Oh, and honey is basically a super food.

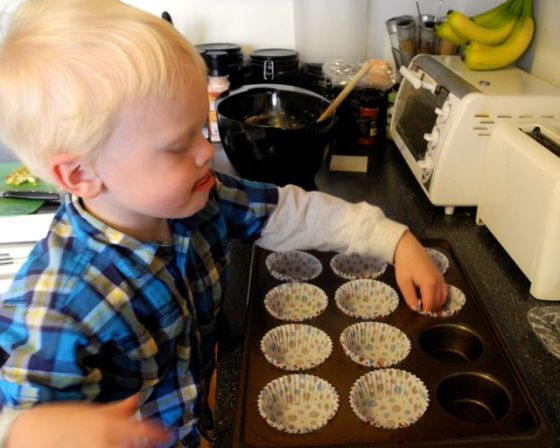
We make a batch of muffins almost every week, and it lasts about a week for breakfasts or snacks since we don’t eat them every day. They’re quick to make, really tasty, healthy, and filling. And one of the reasons I love to make muffins is that my little boy loves to help me make them!

making apple pie bran muffins

He’s such a good little helper in the kitchen! (When he’s not trying to snitch bites of dough or spilling things… Also, I don’t know what’s up with the tongue sticking out.) He stirs up all the dry ingredients for me while I mix the wet, and he puts the muffin liners in the pan, and he puts the ingredients away when we’re done with them. And he also sings the “Muffin Man” song while we make them. He’s pretty adorable sometimes.

This recipe is adapted from my Honey Orange Bran Muffins recipe, but I made enough changes that I decided to give these their own post.

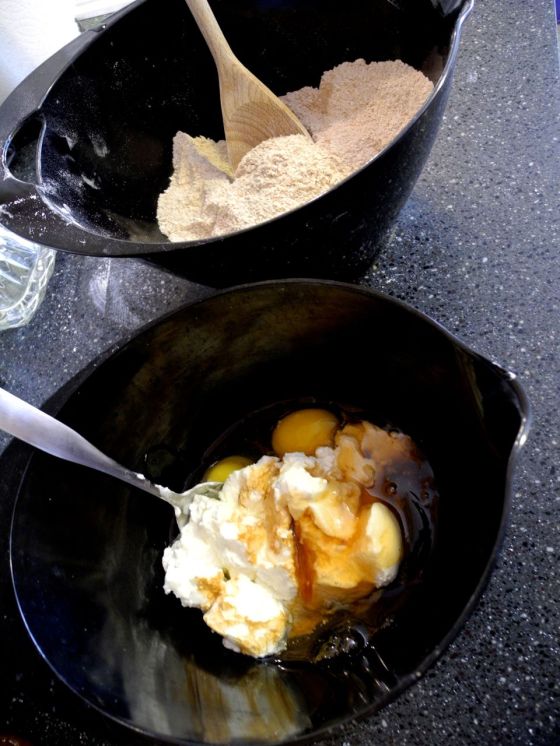
Start by mixing up all the dry ingredients – the oat bran, whole wheat flour, baking soda and powder, cinnamon, nutmeg, and salt – in a large bowl.

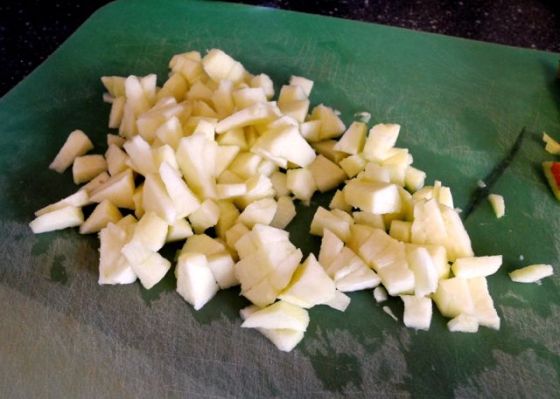
Peel and chop the apple into small pieces.

apple cinnamon bran muffins recipe

Mix the wet ingredients – the yogurt, applesauce, eggs, honey, vanilla – in a smaller bowl. Fold in the apple chunks. Then pour the yogurt mixture in with the flour mixture, folding together until everything is moist.

honey orange bran muffins recipe 1


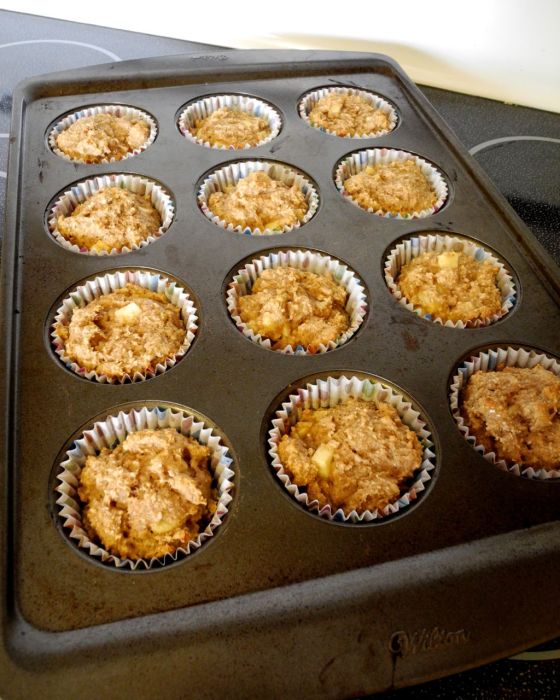
Spoon into muffin pan (I use paper liners) and bake at 350 for about 12 minutes.

apple pie bran muffins recipe

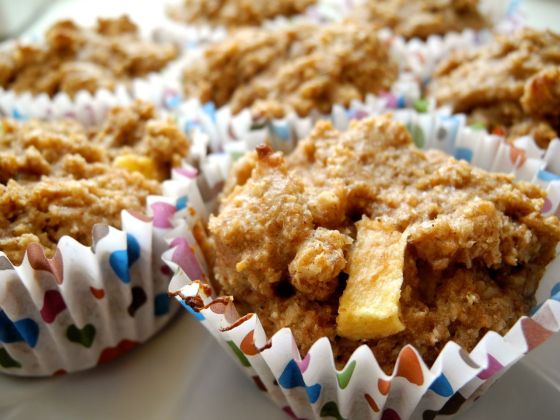
They should be turning golden on the top. Let them cool on a wire rack, and enjoy! These muffins tend to look a bit lumpier on top than the other ones, but they’re still delicious! (And healthier since I subbed out the sugar for applesauce!)

no sugar apple cinnamon bran muffins

Apple Pie Bran Muffins

1 cup oat bran (wheat works too)
1 cup whole wheat flour
1/2 tsp baking soda
1 tsp baking powder
1 tsp cinnamon
1/2 tsp nutmeg
pinch salt
1 cup Greek yogurt
2 eggs
1/4 cup applesauce
1/4 cup honey
1 tsp vanilla
1 small apple

1. Preheat oven to 350. Mix all dry ingredients – bran, flour, baking soda and powder, cinnamon, nutmeg, and salt – in a large bowl.

2. Peel and chop the apple into small pieces.

3. Mix all wet ingredients – yogurt, eggs, applesauce, honey, and vanilla – in smaller bowl. Fold in apple pieces. Pour into the large bowl with the dry ingredients, and stir until combined, and all ingredients are moist.

4. Spoon batter into greased muffin pan (or with paper liners). Fill each muffin about 3/4 full. Bake for about 12 minutes, or until tops begin to turn golden brown. Let cool on wire rack.

Makes about 18 muffins


Mango Avocado Salsa

Mexican food was a staple of my diet all growing up. Mangos, unfortunately, were not. So now I find any excuse I can to sneak mangos into my meals (or salsa) because they’re rather delicious.

mango avocado salsa

If you shop at Costco, you’ve probably seen the mango salsa they sell there. It’s pretty good, but nothing ever quite compares to making it fresh. Especially when you can find good mangos for a good price! One of the keys to making good mango salsa is starting with good mangos. How do you choose a good mango? Find one with as little green as possible! The more red, the more delicious! It should be mostly red, with some yellow (and probably a little green, cuz let’s face it – you’re probably not going to find a perfect one unless you go to the tropics) and it should be somewhat firm but not hard.

So once you’ve got your mangos, you might be wondering what exactly to do with them. They can be a bit tricky, with their big, weird-shaped seed in the middle, and the skin that needs peeled off, but once peeled the mangos are super slippery. Well, let me share what I’ve found to be the easiest, fastest way to cut up a mango:

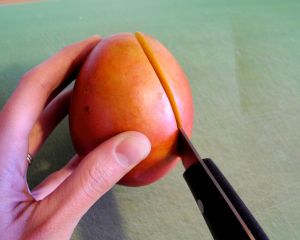
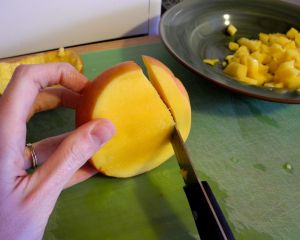
time saverStart by slicing down one side of the seed, starting at the top towards the middle, and curving outward around the seed, down to the bottom.

how to cut a mango 1

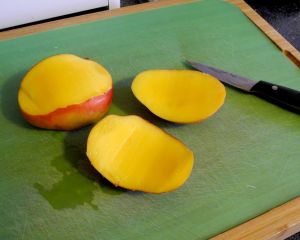
Repeat on the other side, so you end up with two slightly curved pieces that you cut off, and the seed (with some usable fruit still).

how to cut a mango 2

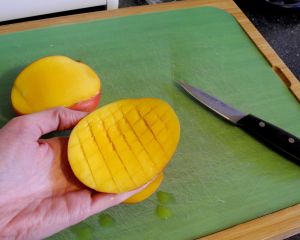
Cut a cross-hatch pattern into the fruit, cutting dow to the skin but not through.

how to cut a mango 3

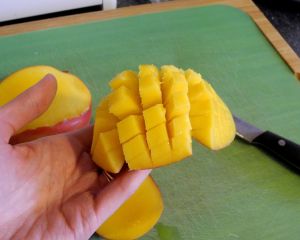
Then flip it inside out, pushing the fruit up and out of the skin. Some pieces will probably just fall out, and the rest you can just run the paring knife as close to the skin as possible.

how to cut a mango 4

Repeat these steps on the other two sides of the seed (there is much less fruit here, but still enough to be worthwhile).

how to cut a mango 5

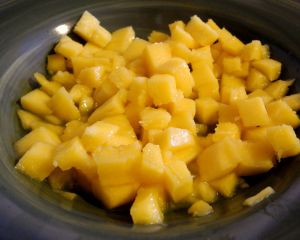
And now you’ve got lots of delicious mango bits!

mango salsa recipe

Now it’s salsa time! Chop up the green onion, crush the garlic, seed and chop the tomato and pepper, and cut up the avocado.

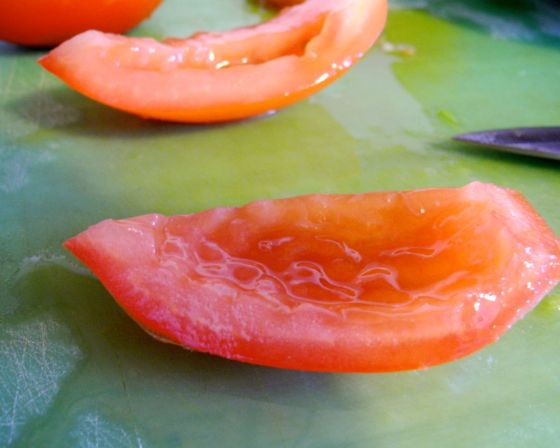
To seed the tomato, just cut it in quarters lengthwise, and then run a knife from one end to the other, just under the seeds, and they should fall right off.

mango salsa recipe deseed tomato

To cut up the avocado, basically follow the same method as cutting the mango, but just slice it in half instead of cutting around the seed. Or look at this post for some pictures and tips.

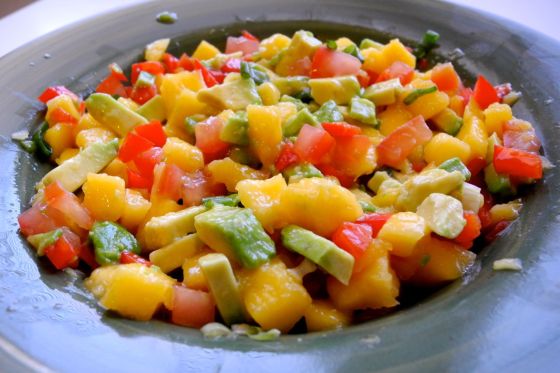
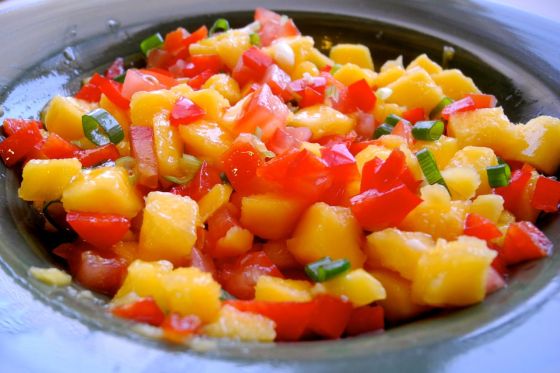
Stir everything up, let it sit for at least 15 minutes so the flavors can mix a bit, and enjoy!

mango salsa

(I know, it doesn’t have any avocado yet here… but it’s still delicious and beautifully colorful!)

Just eat it on chips, or put it on tacos, burritos, quesadillas, nachos….

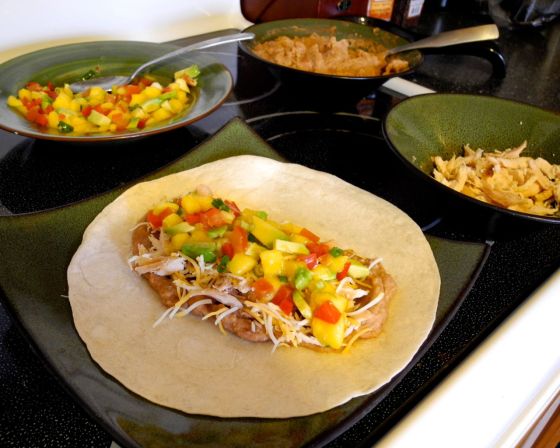
mango avocado salsa burritos

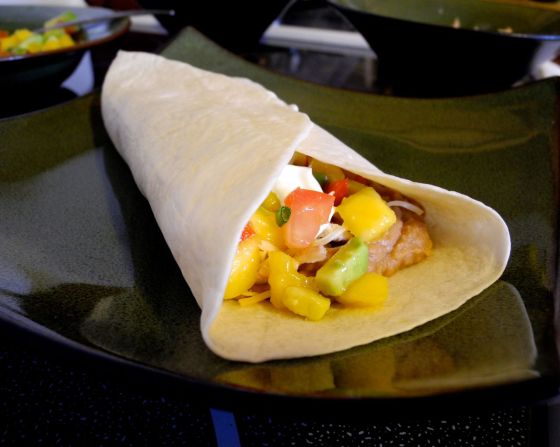
We made chicken burritos with leftover rotisserie chicken, some refried bean, and the mango avocado salsa, and it was super yummy! So simple, and a great use for any leftover chicken!

mango avocado salsa chicken burrito

Mango Avocado Salsa

2 large ripe mangos
1 roma (or other small-medium) tomato
1 large avocado
1 red pepper
2 green onions
2 garlic cloves

1. Peel and chop the mangos (see tips above). Seed and chop the tomato and pepper. Cut up the avocado. Slice the green onions. Mince or crush the garlic. Mix all ingredients in a bowl.

2. Let sit for about 15 minutes (or longer if you want) for the flavors to mix. Stir and serve!

Makes about 2-3 cups salsa.

change it upAdd a jalapeno or other chili pepper for a spicier salsa. Or add some chopped cilantro! (I just didn’t because my husband doesn’t like it!)

Lentil Vegetable Coconut Korma

Somehow I made it through more than twenty years of life without ever eating Indian food. It’s tragic, really. So to make up for lost time, we eat a lot of Indian food now. It’s just so delicious!

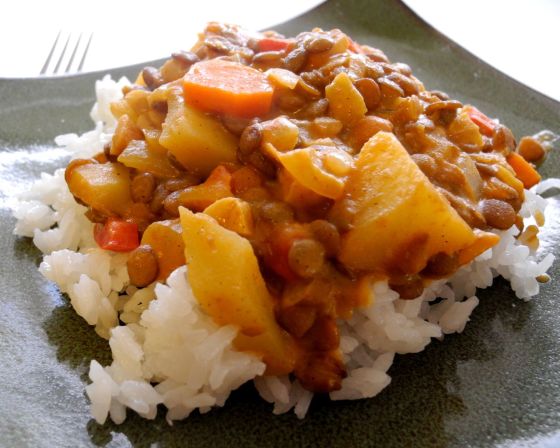
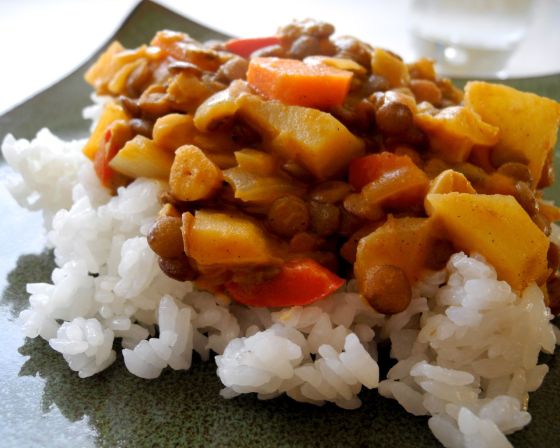
lentil vegetable coconut korma

I’ve experimented with lots of different recipes, but my favorites to make always use coconut milk as a base for the sauce. It gives it so much flavor and makes it nice and creamy! Plus, of my experimental recipes, the ones with coconut milk have always turned out the best. Maybe some day I’ll figure out how to make some other types of Indian food… but coconut milk is just so good I don’t really mind.

We’ve been trying to have at least a few dinners each week without meat. It cuts down on cost significantly, and it’s generally healthier to eat less meat than most people eat. This meal still gets you a nice amount of protein with the lentils and cashews. But you could easily add/substitute chicken, fish, etc. That’s one of my favorite things about this recipe – it’s so versatile! You could honestly put just about anything in there, and it would taste good!

its good for youLentils have tons of soluble fiber (great for lowering cholesterol, filling you up, and stabilizing blood sugar, among other things) and are also high in protein. Carrots have lots of vitamins and antioxidants. Coconut milk has lots of vitamins and minerals, but is a bit high in saturated fats (although with no meat, and spread between at least six servings, it’s not bad.)

vegetable korma recipe

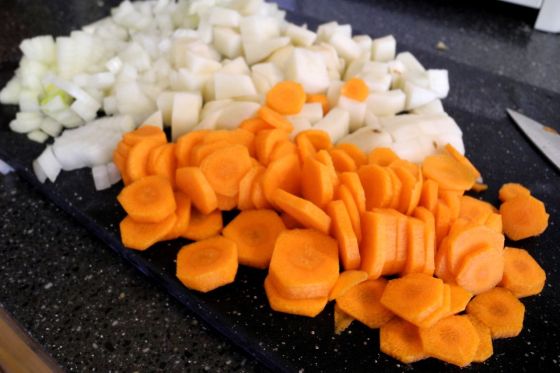
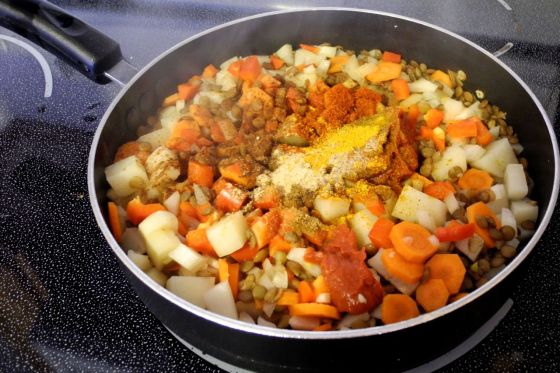
Get the lentils started on the stove while you chop up the vegetables.

vegetable korma with lentils recipe

Add the vegetables and spices, stir, and let it simmer for about 20 minutes, until the lentils and veggies are soft. (If you can find a korma spice mix at the store, that should work just fine. Just check the sodium – a lot of packaged spice mixes have tons of salt!)

coconut korma with lentils and vegetables

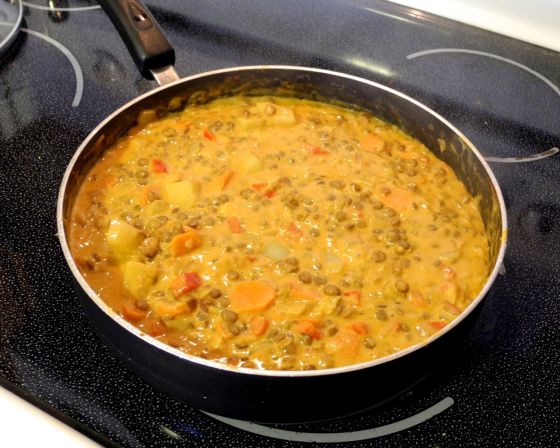
Add the tomato paste and coconut milk and stir well. Let it simmer for about 10 minutes. Stir in the cashews. Do a taste test to see if you need to add any more spices or salt. Then serve over rice.

vegetable coconut korma with lentils

Lentil and Vegetable Coconut Korma

1 cup lentils
3 cups water
1 onion
2 cloves garlic
1 red pepper
2 carrots
2 small potatoes
1 tsp curry powder
1/2 tsp cinnamon
1/2 tsp cardamom
1/2 tsp ginger
1 tsp paprika
1/4 tsp cayenne pepper (more if you like it hot)
1/4 tsp saffron
3 Tbsp tomato paste
1 can coconut milk
1/4 cashews, roughly chopped
salt to taste

1. Combine lentils and water in a large pan, and bring to boil over medium-high heat. Once it boils, reduce heat to low.

2. While lentils begin cooking, chop the onion, pepper, carrots, and potatoes. Add to the lentils. Crush in the garlic, and add the spices. Let simmer for about 20 minutes, until lentils and vegetables are soft.

3. Stir in tomato paste and coconut milk. Simmer another 10 minutes.

4. Add cashews. Check the flavor, and add salt or more spices if desired. Serve over rice.

Makes about 6 servings

change it upAdd pineapple chunks for a sweeter curry. Add or substitute sweet potatoes, cauliflower, or other vegetables. Add chicken, fish, or beef for a “heartier” meal.